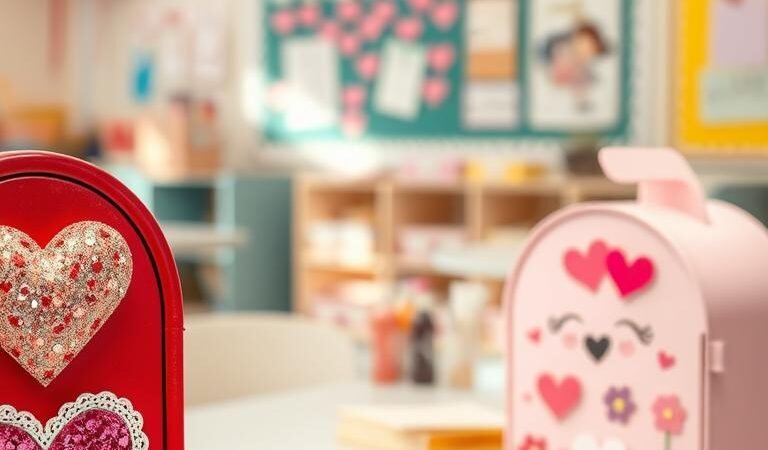
Valentine’s Day is just around the corner, and classroom celebrations are in full swing. One of the most exciting activities for students is exchanging Valentine’s cards and treats. To make this experience even more special, teachers can create personalized mailboxes that add a touch of love and fun to the classroom.
Creating DIY mailboxes offers a perfect opportunity to combine creativity, recycling, and practical crafting skills for students of all ages. These projects can be adapted for any classroom setting, from preschool to upper elementary, with varying levels of complexity.
By making these mailboxes, students can look forward to a fun and interactive way to collect their Valentine’s Day cards and treats.
Key Takeaways
- Personalized mailboxes make Valentine’s Day classroom celebrations more special.
- DIY mailbox projects combine creativity, recycling, and practical crafting skills.
- Mailbox projects can be adapted for various classroom settings and age groups.
- These projects serve a practical purpose and become cherished keepsakes.
- Mailbox ideas can be simple or elaborate, suiting every classroom need.
The Magic of DIY Valentine Mailboxes
DIY Valentine mailboxes bring a touch of magic to the classroom on Valentine’s Day. This creative project not only adds excitement to the celebrations but also provides a unique learning experience for students. By making their own mailboxes, children can express their creativity and develop various skills.
https://www.youtube.com/watch?v=T5PMj0reKL8
Why Valentine Mailboxes Matter in the Classroom
Valentine mailboxes play a significant role in classroom celebrations. They provide a fun way for students to receive valentines from their classmates, making the day special for everyone. Having a personal mailbox allows students to feel included and excited about receiving cards and messages from their peers.
Moreover, creating these mailboxes in the classroom setting fosters a sense of community and friendship among students. It’s an activity that encourages social interaction and makes the Valentine’s Day celebration more memorable.
Benefits of Creating DIY Mailboxes with Kids
Creating DIY mailboxes with kids offers numerous benefits. It helps develop their fine motor skills as they cut, fold, and glue their creations. The project also encourages resourcefulness by repurposing everyday items like cereal boxes and paper plates.
- Develops fine motor skills through cutting, folding, and gluing
- Encourages resourcefulness and eco-consciousness
- Enhances planning and spatial reasoning
- Allows for self-expression and personalization
- Provides a hands-on opportunity to practice following instructions
- Incorporates STEM principles for older students
- Boosts confidence and sense of accomplishment
- Teaches creativity within constraints
By engaging in this activity, students not only have fun but also gain valuable skills and experiences that contribute to their overall development.
Essential Materials for Valentine Mailbox Ideas DIY

Gathering the right craft supplies is essential for making unique and personalized Valentine mailboxes. To start, you’ll need some basic materials that will serve as the foundation for your mailbox.
Basic Supplies You’ll Need
The base of your mailbox can be made from a variety of materials, such as a cereal box or a paper plate. You’ll also need paper or cardstock to decorate it. Glue is essential for assembling the different parts of your mailbox. Make sure you have scissors on hand to cut out any shapes or designs you want to add.
Optional Decorative Elements
To give your mailbox a personal touch, consider adding decorative elements like heart-shaped stickers, doilies, or washi tape. You can also use markers, crayons, or colored pencils to draw or color your mailbox. Other options include glitter, sequins, ribbons, yarn, or pipe cleaners to add texture and visual interest. For younger kids, foam shapes, especially hearts, are easy to work with and add dimension to your mailbox design.
By combining these materials, kids can create their own unique Valentine mailboxes that reflect their personality and creativity.
Simple Cereal Box Valentine Mailbox
A simple cereal box can become a special Valentine mailbox with just a few craft supplies. This DIY project is perfect for kids to share love and kindness in the classroom.
Materials Needed
To create your Simple Cereal Box Valentine Mailbox, you’ll need a few basic materials. These include a clean, dry cereal box, colored paper or cardstock, scissors, glue, and any additional decorative items like hearts, stickers, or markers. Choose pink, red, and purple paper to give your mailbox a festive Valentine’s Day look.
Step-by-Step Instructions
Begin by emptying and cleaning your cereal box. Decide which side will be the front and draw a rectangular mail slot using a pencil. Carefully cut out the slot with scissors, ensuring it’s large enough for valentine day cards to fit through.
Next, measure and cut construction paper to cover each side of the box. Apply glue to one side at a time, smoothing the paper over it and pressing firmly to eliminate air bubbles. Fold the overlapping edges neatly around corners and secure with additional glue.
Once the glue is dry, personalize your mailbox by adding the student’s name prominently on the front or top. Decorate with Valentine-themed elements like hearts or cupids. For added durability, consider reinforcing the mail slot edges with tape on the inside of the box.

Paper Plate Pocket Mailbox for Small Spaces
For classrooms with limited space, a paper plate pocket mailbox is an ideal solution. This creative project is not only fun for kids but also helps keep the classroom organized during Valentine’s Day celebrations.
Materials Needed
To make a paper plate pocket mailbox, you’ll need a few simple materials: paper plates, scissors, glue (hot glue or school glue), string or yarn, and decorative items like heart doilies and red markers. Cardstock can be used for additional decorations or to reinforce the mailbox.
Step-by-Step Instructions
Start by cutting one paper plate in half with scissors, creating two semi-circles. Take a whole paper plate and place it flat on the table with the eating surface facing up. Position the half plate on top of the whole plate, aligning the straight edge of the half plate with the middle of the whole plate. Secure the two pieces together by applying glue along the curved edge of the half plate, leaving the straight edge open to create a pocket.
Once the glue has dried, punch two holes at the top of the whole plate, approximately 2 inches apart. Thread string, yarn, or ribbon through the holes and tie to create a hanger. Have students decorate the front of their plate pocket with their name prominently displayed. To ensure durability, consider reinforcing the bottom edge of the pocket with an additional strip of tape or glue.

Recycled Drink Box Valentine Mailbox
Transforming a recycled drink box into a Valentine mailbox is a fun and creative DIY project. This upcycling idea not only reduces waste but also provides a unique and personalized mailbox for your child’s classroom Valentine’s Day exchange.
Materials Needed
To create your Recycled Drink Box Valentine Mailbox, you’ll need the following materials:
- A clean, dry drink box
- White paper or wrapping paper
- Glue or a glue stick
- Decorative elements like doilies or heart cutouts
- Cardstock or construction paper for the nameplate
- Scissors
- Strong tape
- Optional: ribbon for a handle
Step-by-Step Instructions
Follow these easy steps to create your mailbox:
- Clean and dry the drink box thoroughly, removing any labels or residue.
- Determine the top and bottom of the box, securing the bottom with strong tape.
- Decide on the mail slot: either use existing holes or create a new one on the side.
- Wrap the box with white paper, gluing it in place section by section.
- Allow the glue to dry before adding decorative elements like doilies or hearts.
- Create a nameplate using cardstock and attach it to the front.
- Optionally, add a ribbon handle by punching holes and threading ribbon through.
- For extra durability, apply a thin layer of diluted school glue as a sealing coat.

3D Paper Cube Valentine Mailbox STEM Challenge
Engage your students in a fun and challenging project with the 3D Paper Cube Valentine Mailbox STEM Challenge. This activity combines creativity with structural engineering, making it an ideal project for kids to learn and have fun during Valentine’s Day.
Materials Needed
To start this project, you’ll need the following materials:
- 8.5×11 cardstock or heavy paper (8 sheets)
- Glue
- Tape
- Scissors
- Wax paper (for decorative windows)
- Valentine decorations (lightweight)
These materials will help you create a sturdy and visually appealing mailbox.
Step-by-Step Instructions
Begin this STEM challenge by explaining to students that they will be creating a structurally sound mailbox using only paper, glue, and tape. Here’s how to make it:
- For the base of the cube, take 4 sheets of cardstock and fold each one into thirds lengthwise, creating long, narrow strips with extra stability.
- Apply glue along one long edge of each folded strip and allow it to dry completely. This creates a stronger structural element than single-layer paper.
- Once dry, fold each of these reinforced strips in half to create an “L” shape that will form the corners and edges of your cube.
- Arrange the four “L” shaped pieces on a flat surface to form a square frame, with one part of each “L” lying flat and the other pointing upward.
- Carefully align the corners where the flat portions overlap and secure with glue or tape, creating a square base with four upright supports.
- For the sides of the cube, prepare 4 more sheets by folding them into thirds the short way, then folding them in half to create shorter “L” shapes.
- Position these shorter “L” pieces to connect the upright supports, forming the top edges of your cube structure.
- Secure all joints with glue and reinforcing tape, making sure the cube structure is square and even on all sides.
- For the lid, repeat the same process to create a second cube frame that fits over the base.
- To create a solid bottom for the mailbox, cut additional paper to fit inside the base and secure with glue.
- For decorative windows, cut openings in some sides of the cube and cover with wax paper secured from the inside.
- Add Valentine decorations to the exterior, focusing on lightweight elements that won’t compromise the structural integrity.
Test the finished mailbox by gently placing valentine cards inside to ensure it holds its shape under the weight of multiple cards.

Adorable Unicorn Valentine Mailbox Design
Unleash your creativity and make a charming unicorn mailbox for Valentine’s Day that will become the centerpiece of your classroom celebrations. This delightful project combines art and fun, creating an interactive way for kids to receive Valentine’s Day cards.
Materials Needed
To create your unicorn mailbox, you’ll need a few basic supplies: a mailbox or a box to serve as the base, white or iridescent cardstock for the horn, pink cardstock for the ears, colorful cardstock for the flowers, glue, scissors, and any additional decorative elements like googly eyes or markers.
Having a paper quilling tool or a DIY quilling tool can be helpful for creating the flowers, but it’s not mandatory.
Creating the Base Mailbox
Start by preparing your mailbox or box. If you’re using a plain box, you can decorate it with paint, markers, or wrapping paper to make it more appealing. Ensure it’s sturdy enough to hold Valentine’s Day cards. If your box doesn’t have a slot, create one by cutting a horizontal line on the front.

Once your base is ready, you can start adding the unicorn features. This involves creating the horn, ears, and flowers that will transform your mailbox into a magical unicorn.
Adding Unicorn Features
Let’s start with the horn. Gently roll the horn piece into a cone shape and secure it with glue. Fold the base tabs outward to attach it to the mailbox later. Next, create the ears by cutting out ear shapes from pink cardstock and layering them with smaller inner ear shapes. Attach these to either side of the horn.
Create a colorful mane by making paper flowers using a quilling tool or by rolling spiral shapes from colorful cardstock. Arrange these flowers around the base of the horn to frame the unicorn’s face. Finally, add eyes, eyelashes, and rosy cheeks to complete the unicorn’s adorable face.
Finish your design with any additional decorative elements like hearts or stars that complement the unicorn theme. Ensure all parts are securely attached before using the mailbox for Valentine card collection.
Conclusion: Celebrating Creativity Through Valentine Mailboxes
DIY Valentine mailbox projects bring a new level of excitement to classroom Valentine’s Day celebrations. These creative endeavors not only transform a simple card exchange into a memorable experience but also provide students with a keepsake they can be proud of. By engaging in mailbox creation, students develop STEM skills while expressing their unique creativity.
The benefits of these projects extend beyond Valentine’s Day, fostering classroom community, problem-solving, and spatial reasoning. Teachers can connect mailbox creation to various curriculum areas, and parents can participate by collecting materials or assisting during the project. Ultimately, DIY Valentine mailboxes create joy and excitement around giving and receiving messages of friendship and appreciation.