Ready to turn blooms into lasting wedding art? This post walks couples through simple, budget-friendly projects that make big impressions. You’ll learn how to pick the right flowers and paper, press blooms, and assemble a polished piece for your big day and your home.
We cover three easy ways to press blooms: weight in a book, a dedicated press, and a microwave press for quick results. You’ll see when to use cardstock or watercolor paper, how to glue petals without crushing them, and why shadow boxes protect delicate art.
Tools you likely have today—heavy books, parchment, tweezers, white glue—are enough to start. We’ll also flag optional upgrades and affiliate examples like a Microfleur press and budget frames so you can plan time and cost.
This tutorial previews wedding-ready projects—from invitations to framed keepsakes—and ends with a planning checklist to fit each project into your timeline.
Key Takeaways
- Choose flat blooms and sturdy paper for the best results.
- Three pressing methods suit different timelines and comfort levels.
- Simple household tools can create beautiful, lasting art.
- Use shadow boxes or mats for thicker pieces and long-term display.
- Affiliate options help estimate cost and sourcing before you shop.
Why Pressed Flower Art Is Perfect for Weddings
Turning wedding blooms into flat botanical art preserves the look and memory of the day without adding bulk or fragility. This gentle format flatters stationery, signage, and keepsakes while staying light for shipping and display.
Use flowers from your bouquet or garden to create heirloom pieces. Pick blooms near full bloom, dry and blemish-free, in the morning for best color retention. Avoid fleshy petals; split or separate thicker blooms so they press evenly.
Book and flower press methods yield the best results in about 2–4 weeks. Planning ahead gives you time to dry blooms and test layouts. Quick methods exist, but the slower approach keeps color truer.
- Versatile looks: modern botanical to airy romantic, using real materials for shape and line.
- Framing tip: use thick mats or shallow shadow boxes to prevent mashing and to elevate the finish.
- Sustainable and personal: repurpose stems for bespoke keepsakes you’ll cherish long after the post-wedding glow.
| Method | Typical Time | Best Use |
|---|---|---|
| Book | 2–4 weeks | Stationery, framed art |
| Flower press | 2–4 weeks | High color retention, large batches |
| Quick methods | Same day | Last-minute accents, small petals |
Essential Supplies and Prep: From Flowers to Frames
Start with quality supplies so your wedding blooms dry flat and look polished on paper. Pick flat blooms like pansies and daisies, small hydrangea florets, baby’s breath, and fern leaves. Clip stems short so arrangements sit flush on the base.

What to have on hand
Household tools do most of the work. Use heavy books for weight, parchment paper as absorbent liners, and cardboard to add even pressure between layers.
- Tweezers for delicate handling
- White glue (thin with water) or Mod Podge for smooth adhesion
- Cardstock or watercolor paper for sturdier bases
Which pressing method fits your plan
Choose a flower press for even pressure and color retention. The book method is low-cost and reliable. Use a microwave press for same-day needs like escort cards.
| Method | Speed | Best for |
|---|---|---|
| Flower press | 2–4 weeks | Large batches, high color retention |
| Book | 2–4 weeks | Budget-friendly stationery pieces |
| Microwave | Same day | Last-minute accents and thin petals |
Before gluing, do a quick layout test on your paper and snap a phone photo for reference. Pat blooms dry to avoid mold and get brighter results.
How to Press Flowers Step-by-Step for Wedding-Ready Results
This short tutorial covers four reliable ways to press blooms so they hold color and shape for wedding stationery and keepsakes.
Book method (2–4 weeks): Line a thick book with parchment paper, arrange flowers with space between each, set the prettier side down, and close the book. Stack additional books on top to add steady weight. Parchment paper works well and usually does not need changing while you wait weeks for full drying.
Wooden or store-bought flower press: Build a press with plywood/MDF, bolts, and wingnuts or buy a ready-made press. Layer parchment, the flower, parchment, then cardboard and tighten evenly. Even pressure helps preserve color and reduces surprises during the same 2–4 week time frame.

Microwave option for same-day results: Use a microwave press like Microfleur or a microwave-safe plate method. Start with one ~25-second burst, then 10-second intervals, airing plates between bursts. Stop when petals feel paper-thin to avoid scorching.
Ironing in a pinch: Place blooms between parchment sheets and use low heat with steam off. Move in 15–30 second passes and allow cooling between goes. This is fast but may cause slight ripples and a dulled finish compared to other techniques.
- Always flip to the most photogenic side before pressing.
- Keep consistent spacing so flowers don’t stick together.
- Avoid textured paper towels; use parchment paper or blotting paper for best surface finish.
DIY Pressed Flower Crafts
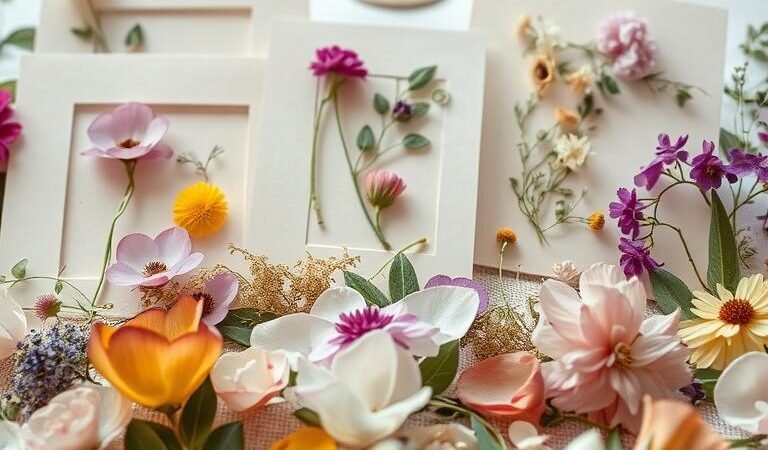
Small botanical accents can unify your wedding style across stationery and décor. Use cardstock or watercolor paper for invitations and save-the-dates, plan layouts, and photograph each design before gluing.

Invitations & save-the-dates: pick flat daisies, pansies, or tiny hydrangea florets. Apply a thin layer of thinned white glue with a small brush and press gently with tweezers.
Escort/place cards and tags: use single petals or smallest stems so cards stay stackable and crisp. For menus, programs, and welcome signs, layer linear fern leaves behind round blooms to keep text readable.
Framed pieces & tables: mount table numbers and seating charts in shallow shadow boxes or under glass with thick mats to protect dimension. For resin coasters, seal fully dry, paper-thin flowers first, then encase.
- Keepsake shadow box: combine pressed elements with a few dried accents and secure with archival dots.
- Guest-book frame: ring the mat with blooms and invite signatures around a central photo.
Assembly Tips for Professional-Looking Wedding Crafts
Start assembly with a clear plan so each botanical element sits intentionally on the page.
Take a phone snapshot of your layout so you can return pieces to exact spots before you glue.
Layout like a pro
Layer larger flower shapes first, then add medium and small accents to fill gaps.
Capture a phone photo and use it as a guide when you lift and attach petals or tiny stems.
Gluing techniques
Use a small brush and a thin film of white glue or Mod Podge on the back of elements.
Apply adhesive sparingly to thicker veins to avoid show-through. Test on scrap paper first.
Dry flat under a clean sheet with a light, even press to prevent curling.
Framing without flattening
Pick a thick mat or shallow shadow box to keep the top glass away from the piece.
For deeper elements or dried flowers, tuck a thin cardboard spacer behind the glass.
Clean the glass on both sides before closing to avoid visible dust on dark paper.
Quick checklist
| Step | Action | Why it helps |
|---|---|---|
| Plan | Photograph layout | Recreates exact placement for best results |
| Adhere | Thin glue on back | Prevents buckling of paper and keeps edges neat |
| Protect | Mat or shadow box + cardboard spacer | Keeps top glass clear of petals and adds depth |

Style Guides: Match Pressed Flower Projects to Your Wedding Theme
Decide on contrast and texture early to guide how you place each bloom across stationery and décor. A clear visual choice makes it easier to match invitations, signage, and table pieces.
Modern botanical on dark paper
Dark navy or black paper makes greenery and blooms pop. Arrange elements side by side in neat rows or grids for a museum-like, curated look.
Use pansies and small hydrangea florets for tight color pops. Keep negative space around type so text stays legible.

Airy romantic on watercolor paper
Watercolor paper with a soft deckle creates a light, romantic backdrop. Let layouts breathe and pair whites, blushes, and fern fronds for gentle movement.
Queen Anne’s lace adds lace-like texture at the top or corners to frame text without crowding it.
- Pull palette ideas from your flowers garden or bouquet so pieces read cohesive.
- Repeat two or three anchor blooms across items to unify the day.
- For a premium finish, use deep mats or shallow shadow boxes to create a floating, gallery-style display.
| Style | Paper | Best blooms | Finishing touch |
|---|---|---|---|
| Modern botanical | Dark navy cardstock | Pansies, small hydrangea florets | Grid layout; deep mat frame |
| Airy romantic | Watercolor paper with deckle | Small daisies, Queen Anne’s lace, ferns | Soft spacing; shadow box with spacer |
Planning, Sourcing, and Storage
A clear schedule and the right storage keep your botanical pieces vibrant until the big day. Start by deciding which items you’ll make at home and which you may order to fill gaps.
Timeline
When to press and what to microwave day-of
For most projects, use a book or flower press and allow 2–4 weeks to dry. This gives the best color and shape retention. Reserve the microwave for quick touchups: try one 25-second burst, then 10-second intervals, airing between bursts until petals feel paper-thin.
Sourcing
Buy online or press from your bouquet?
Order pressed flowers to solve seasonality or to match multiple pieces. Or save stems from your bouquet and garden and press them yourself to keep the look personal.
Storage tips
- Keep stems in water until you press, then blot dry so no moisture remains.
- Interleave parchment or blotting paper between pieces and stack in shallow boxes with cardboard dividers, labeled by color and size.
- Use your phone to catalog layouts and track which flowers worked best for reorders or repeat runs.
- If using books, rotate books on top; if a flower press is used, check wingnuts for steady compression.

Tip: Affiliate tools like Microfleur and pre-cut mats can save time today, but match your method to the project count and lead time for best results.
Conclusion
The right method and a simple plan turn wedding stems into lasting keepsakes. A book or wooden press is the best way for deep color and stable shape over 2–4 weeks. Use a microwave press for quick results when time is tight, but vent between bursts to avoid scorching.
Choose clean, dry petals and mount them on heavier paper so each piece looks intentional and holds up. Keep water off finished pieces and use a light touch with thin glue to avoid show-through.
Photograph favorite layouts and note blooms used so you can repeat them. Protect the final piece with a mat or shallow shadow box. Pick one keepsake—like a framed vow or guest-book frame—to make a personal bit of flower art for your home.