Transforming a room with large-scale art pieces can be a daunting task, especially on a budget. However, with a little creativity, you can create stunning wall art that makes a statement without breaking the bank.
DIY large wall art is an excellent way to add a personal touch to your home decor. It allows you to customize your space to perfectly match your style and color scheme. Whether you’re a complete beginner or an experienced crafter, this article will guide you through 12 creative and easy-to-execute projects that can solve the problem of filling expansive wall space, especially in homes with high ceilings.
From upcycled items to budget-friendly alternatives to expensive art, we’ll explore a range of materials and techniques to help you create unique and captivating wall art. Get ready to unleash your creativity and give your walls a personalized touch.
Key Takeaways
- Discover 12 creative DIY large wall art projects to enhance your home decor.
- Learn how to customize your space with unique and budget-friendly art pieces.
- Explore a variety of materials and techniques, from upcycled items to affordable alternatives.
- Find solutions for filling expansive wall space, especially in homes with high ceilings.
- Get inspired to create personalized wall art that matches your style and color scheme.
Why Large Wall Art Makes a Statement
Large wall art can instantly elevate the ambiance of a room, making it a focal point that draws attention. A well-chosen art piece can add personality and style to your space, creating a lasting impression on visitors.
Benefits of Statement Pieces in Home Decor
A statement piece of wall art can transform a bland space into a vibrant atmosphere. It adds a touch of elegance and sophistication, making the room feel more inviting. Statement pieces can also reflect the homeowner’s personality and interests.
Determining the Right Size for Your Space
To choose the right size for your wall art, consider the dimensions of your wall and the furniture it will be paired with. A good rule of thumb is to select art that is 2/3 the width of the furniture below it. Leave at least a foot of wall space on either side of the art piece for a balanced look.
- Measure your wall and furniture to determine the ideal art size.
- Use painter’s tape to visualize the art’s size and placement on your wall.
- Hang the art at eye level, approximately 6-8 inches above furniture.
Essential Materials and Tools for DIY Large Wall Art
To bring your DIY large wall art vision to life, you’ll need to gather essential materials and tools. The right equipment will not only make the process smoother but also ensure a professional finish.
Basic Supplies You’ll Need
For most DIY large wall art projects, you’ll need a few basic supplies. These include a large piece of plywood or particle board, wood glue, and a craft knife. If you’re using wallpaper, you’ll also need a seam roller and a brush or roller for applying the wallpaper paste. A mouse sander can be useful for smoothing out the wood surface.
Optional Tools That Make the Job Easier
While the basic supplies will get you started, there are several optional tools that can make the process easier and more efficient. Power tools like a jigsaw and drill can speed up wood-based projects. Specialized art tools such as palette knives and texture tools can enhance certain techniques. Additionally, framing tools can help create professional-looking finished pieces. A projector can assist with transferring designs to large surfaces, and a paint sprayer can provide even coverage on large pieces.
| Tool | Purpose | Benefit |
|---|---|---|
| Jigsaw | Cutting wood | Speeds up wood-based projects |
| Palette Knives | Creating textures | Enhances art techniques |
| Framing Tools | Creating frames | Professional-looking finished pieces |

Budget-Friendly DIY Large Wall Art Ideas
Making large wall art on a budget is easier than you think. With a little creativity, you can create stunning pieces that transform your space without breaking the bank.

Shower Curtain Canvas Art
One of the most surprising materials for large wall art is a shower curtain. By stretching it over a wooden frame, you can create a unique piece of art that’s both large and affordable. To start, select a shower curtain with a design that speaks to you, then follow these simple steps to turn it into a canvas masterpiece.
The key to this project is in the framing. Use sturdy wood to create a frame that matches your desired dimensions, and staple the shower curtain fabric to it, ensuring it’s tight and evenly spread.
Framed Fabric Designs
Fabric can add a touch of warmth and texture to your walls. When choosing fabric for wall art, consider patterns or designs that work well on a large scale. Vintage scarves, remnants, or international textiles can make for fascinating art pieces. Framing options vary from simple to elaborate, allowing you to customize the look to fit your decor.
To achieve a professional appearance, it’s crucial to stretch and secure the fabric properly over the frame. This not only prevents sagging but also ensures that the design remains crisp and vibrant.
Upcycled Wood Projects for Wall Art
With a little creativity, old wood can be repurposed into striking pieces of wall art that add character to any room. Upcycling not only gives new life to discarded materials but also contributes to a more sustainable home decor approach.
Pallet Wood Art Pieces
Pallet wood is an excellent material for creating unique art pieces. To start, you’ll need to disassemble the pallets and clean the wood planks. You can then arrange these planks into various patterns or designs, securing them together to form a cohesive piece of wall art. Consider adding a coat of stain or paint to enhance the visual appeal.

Repurposed Furniture Panels
Repurposing furniture panels is another creative way to produce wall art. Begin by identifying usable panels from discarded furniture. Clean, sand, and repair these panels as needed. You can then transform them into artistic statements by adding decorative elements or preserving the original details like moldings or carvings. Joining multiple panels can create larger, more impactful pieces. To ensure structural integrity, use appropriate adhesives and fasteners, and consider adding a backing for extra support.
By incorporating these upcycled wood projects into your decor, you can create a truly unique and environmentally friendly space.
Creating Art with Wallpaper Murals
Wallpaper murals offer a unique opportunity to turn a blank wall into a stunning focal point. This creative approach to home decor allows homeowners to add personality and style to their living spaces.

Attaching Wallpaper to Wood with a Pallet Frame
One innovative method for creating wall art is by attaching wallpaper to a wooden backing, then framing it with a pallet frame. This technique not only adds depth to the artwork but also provides a rustic, textured border that complements the design within. To achieve this, start by selecting a suitable piece of wood for the backing, ensuring it’s sturdy enough to support the weight of the wallpaper and the frame.
The process involves gluing the wallpaper onto the wooden panel, carefully aligning it to avoid air bubbles or wrinkles. Once the wallpaper is securely attached, construct a frame using pallet wood, which can be disassembled and cleaned before being repurposed. This frame not only enhances the visual appeal but also protects the edges of the wallpaper.
Simple Hanging Method for Thin Plywood
For a more minimalist approach, consider using thin plywood as a backing for your wallpaper mural. This method is particularly effective for large pieces, as it keeps the overall weight down, making it easier to hang on the wall. To reinforce the plywood and prevent warping, attach a stabilizing piece at the bottom. This simple yet effective technique ensures that your artwork remains flat against the wall.
- Use a lightweight hanging solution to minimize the strain on the wall.
- Reinforce thin plywood to prevent bowing or warping.
- Choose appropriate hanging hardware suitable for the weight and size of the artwork.
- Ensure the piece hangs flush against the wall for a clean, professional finish.
This method is particularly advantageous for rental properties, as it minimizes damage to the walls. By using a simple nail or adhesive strip, you can securely display your large art piece without causing significant damage.
DIY Painted Canvas Projects

Unleash your creativity with DIY painted canvas projects that turn ordinary spaces into extraordinary ones. Large canvases provide an expansive area to experiment with various techniques and designs.
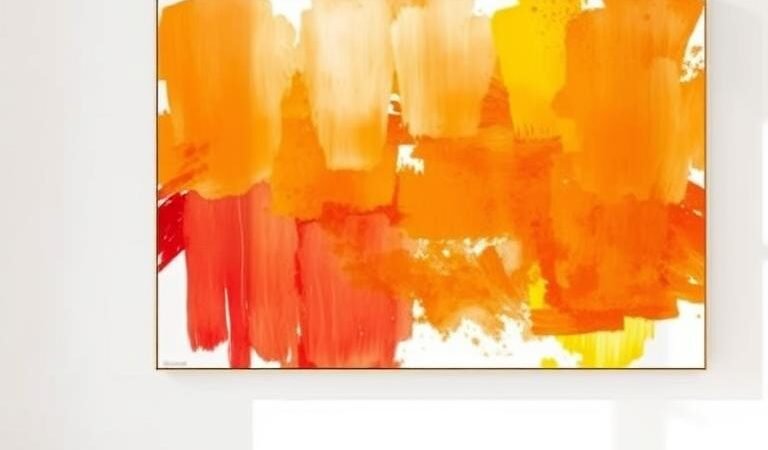
Abstract Designs for Beginners
For those new to canvas painting, abstract designs offer a forgiving and expressive starting point. By using neutral paint colors and intuitive brushstrokes, you can create unique art pieces. As shared by a DIY enthusiast, purchasing two large canvases and “just kinda painting something abstract” resulted in a beautiful outcome.
Geometric Patterns Anyone Can Create
To add a touch of precision to your canvas art, consider geometric patterns. Using simple tools like tape, stencils, and rulers, you can achieve crisp, clean lines. Various design options are available, from simple to complex patterns on your canvas. Selecting the right colors and planning your design ensures a balanced composition that can complement both modern and traditional decor styles.
Textile and Tapestry Wall Hangings
Elevate your living space with the beauty of textile and tapestry wall art. This form of decor not only adds a personal touch but also brings texture and depth to any room.

Mounting Tapestries as Framed Art
To give your tapestry a more polished look, consider mounting it as framed art. This technique involves stretching the tapestry over a frame, which can be made from wood or metal, to create a clean and sophisticated appearance.
Creating Dimension with Textile Art
Adding dimension to your textile art can be achieved through various methods, including layering different materials, incorporating found objects, or using dimensional elements. This not only creates visual interest but also adds depth to your wall hangings.
By employing these techniques, you can transform a simple tapestry into a complex and engaging piece of art that serves as a focal point in any room.
Step-by-Step: Framing Large Art Pieces
Framing large art pieces can elevate the overall aesthetic of a room. A well-chosen frame not only enhances the art but also complements the surrounding decor.
Building a Basic Wood Frame
To build a basic wood frame, start by measuring your art piece and cutting the wood to the required length. Use a nail gun and finishing nails to assemble the frame. Ensure the corners are secure and the frame is sturdy.
Creating a Floating Frame Effect
A floating frame adds depth and dimension to your art piece. To create this effect, cut a lattice and stained 1×2’s to the correct length. Nail the stained lattice onto the frame first, followed by the stained 1×2’s. This creates a floating effect, making your art appear to float within the frame.
- Use a nail gun for a secure hold.
- Choose the right type of wood for your frame.
- Consider the color and texture of the frame to match your art.

Hanging and Displaying Your DIY Large Wall Art
The final step in your DIY large wall art journey is hanging and displaying your masterpiece. Proper placement and hanging techniques can make a significant difference in how your art is perceived in the space.
Proper Hanging Techniques for Heavy Pieces
When hanging heavy large pieces of art, it’s crucial to use the right hardware to avoid damaging your wall or dropping the art. Use sturdy hooks and anchors that can support the weight of your art. For extremely heavy pieces, consider consulting a professional.
Placement Tips for Maximum Impact
The placement of your DIY art can greatly affect its impact in the room. A general rule is to hang art 6-8 inches above furniture. If there’s no furniture beneath it, ensure there’s at least a foot of wall space on either side. Consider the viewing height and adjust accordingly.
| Room Type | Ideal Viewing Height | Spacing Consideration |
|---|---|---|
| Living Room | 57-60 inches from floor | 6-8 inches above furniture |
| Bedroom | 55-58 inches from floor | Above bed or dresser |
| Dining Room | 60-63 inches from floor | Centered above dining table |

Conclusion: Transform Your Space with DIY Large Wall Art
Creating your own large wall art allows you to customize your space perfectly. By doing so, you can enjoy cost savings, personal satisfaction, and a unique piece that reflects your style. The techniques and materials covered in this article offer a range of creative possibilities.
From upcycled wood projects to textile wall hangings, you can choose a method that suits your skill level and preferences. With minimal investment, you can transform your room into a beautiful and personalized space. Start with simpler projects and progress to more complex ones, embracing the character that handmade pieces bring.