Valentine’s Day is just around the corner, and what better way to express your love and appreciation than with a handmade card? In a world where store-bought cards often lack a personal touch, creating your own Valentine’s Day card can be a meaningful way to show you care.
Making your own Valentine cards is easier than you think, and it doesn’t require extensive crafting skills. With basic supplies and simple instructions, both adults and children can create beautiful, heartfelt cards that are sure to impress. From pop-up designs to fingerprint art, the possibilities are endless.
Key Takeaways
- 12 easy-to-make DIY Valentine card ideas for various recipients.
- Simple instructions for crafting beautiful, heartfelt cards.
- Minimal crafting skills and basic supplies required.
- Ideal for romantic partners, family members, or classroom exchanges.
- A meaningful way to express love and creativity without breaking the bank.
- Variety of designs, including pop-up and fingerprint art.
Why Handmade Valentine Cards Make the Perfect Gift
Handmade Valentine’s Day cards bring a personal touch that store-bought cards simply can’t match. In an age where digital communication dominates, a handmade card stands out as a thoughtful and personal gesture.
Creating homemade Valentine cards is not just about making a gift; it’s about creating an experience. It’s an opportunity to spend quality time with family, especially kids, teaching them the value of handmade gifts over store-bought ones.
The Personal Touch of DIY Valentine’s Day Cards
DIY Valentine’s Day cards allow you to infuse your personality into the gift. Whether it’s through a heartfelt message, a funny joke, or a simple drawing, the personal touch makes the card special. This personalization is what makes homemade valentine cards so cherished.
Benefits of Creating Homemade Cards with Kids
Making cards with kids is a fun and educational activity. It helps them develop fine motor skills through cutting, gluing, and drawing. Moreover, it’s a great way to bond and create lasting memories. The process of creating something with their own hands gives kids a sense of pride and accomplishment.
| Benefits | Description |
|---|---|
| Teaches Gift Value | Making homemade Valentine cards teaches kids the value of creating gifts rather than just buying them. |
| Develops Fine Motor Skills | The card-making process helps kids develop fine motor skills through activities like cutting, gluing, and drawing. |
| Creates Lasting Memories | Creating Valentine’s Day cards together becomes a bonding activity and creates lasting memories. |
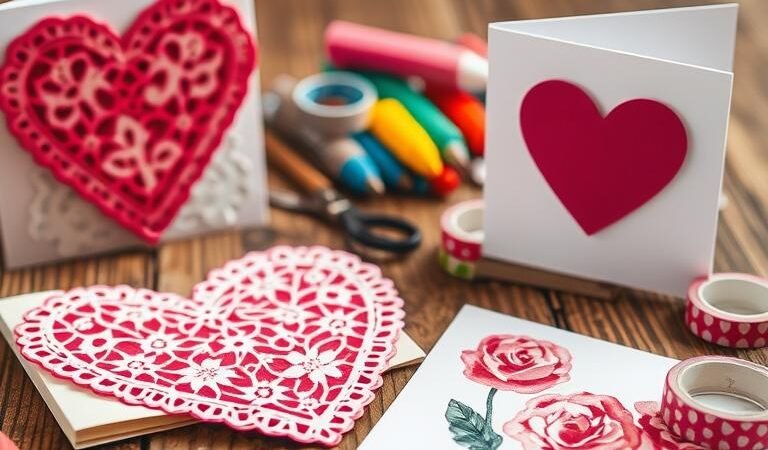
Essential Supplies for Simple Valentine Cards Handmade at Home
Gathering the right supplies is the first step in crafting beautiful, simple Valentine’s Day cards that convey your love and appreciation. To get started, you’ll need some basic materials that can be found around the house or at your local craft store.
Basic Materials You’ll Need
The foundation of any handmade card is good quality paper or cardstock. You’ll also need glue or an adhesive to attach your various embellishments. Scissors are a must-have for cutting out shapes and designs, while a craft mat can help protect your work surface.
- Cardstock or patterned paper for the card base
- Scissors for cutting out shapes
- Glue or adhesive for assembling the card
- Markers or colored pencils for adding color
Optional Embellishments to Have on Hand
To add an extra touch to your Valentine’s Day cards, consider using decorative elements like ribbon, washi tape, or stickers. Dimensional embellishments such as buttons, sequins, or pom-poms can create texture and visual interest. Specialty papers, including glitter paper or metallic cardstock, can add a luxurious feel to your cards.
| Embellishment | Description | Effect |
|---|---|---|
| Ribbon | A colorful or patterned ribbon | Adds a decorative border |
| Washi Tape | A thin, adhesive tape in various patterns | Creates a simple, yet elegant design |
| Stickers | Pre-made adhesive decorations | Adds a playful touch |

Pop-Up Heart Card: A 3D Surprise
Bring your Valentine’s Day wishes to life with a charming 3D pop-up heart card. This delightful card is sure to capture the heart of your loved one, making it a special way to show your love on this day of romance.

Step-by-Step Instructions
To create this beautiful card, start by cutting out a heart shape from red paper. Attach it to the inside of the card using a small piece of folded paper or a spring to create the pop-up effect. Ensure the heart pops up when the card is opened, adding a delightful surprise. You can decorate the card further with glitter, lace, or other embellishments to make it more appealing.
Creative Message Ideas
When it comes to writing a message inside the card, consider phrases that complement the pop-up heart design. Some ideas include:
- “My heart pops up for you!” – a fun way to express your feelings.
- “You make my heart leap!” – a playful connection to the card’s movement.
- “My love for you grows deeper each day” – a romantic message for significant others.
- “Our friendship is truly dimensional” – a clever reference to the 3D aspect for friends.
Keep your words short and centered so they don’t compete with the pop-up element. Consider writing part of the message on the pop-up heart itself for an added surprise.
| Message Type | Example Messages |
|---|---|
| Romantic | “My love for you grows deeper each day” |
| Playful | “You make my heart leap!” |
| Friendship | “Our friendship is truly dimensional” |
Fingerprint Heart Cards: Perfect for Little Hands
Fingerprint heart cards are a delightful way to celebrate Valentine’s Day with little ones. This fun and creative project allows kids to leave their mark on a special day.

Using thumbprints to create heart designs is not only adorable but also a great way to involve kids in the Valentine’s Day preparations. It’s an activity that can be enjoyed by children of various ages.
How to Create Adorable Thumbprint Designs
To start, you’ll need some basic supplies like paper, paint, and a surface to work on. Have the kids dip their thumbs in paint and stamp onto the paper to create heart shapes. You can then guide them to add simple details to make their thumbprint hearts more engaging.
Turning Fingerprints into Love Bugs
Transform thumbprint hearts into “love bugs” by adding tiny legs, googly eyes, and antennae. You can use fine-tip markers to draw on these details. Adding speech bubbles with loving messages can make the cards even more special. Here are some ideas to get you started:
- Add legs to the bottom of the heart shape to create bug-like creatures.
- Use googly eyes or draw them with a white gel pen for a playful look.
- Create antennae at the top of the heart with simple curved lines.
- Group multiple love bugs together to tell a little story on your Valentine’s Day card.
| Age Group | Materials Needed | Tips |
|---|---|---|
| 3-5 years | Paper, washable paint, fine-tip markers | Use simple designs and be prepared for mess. |
| 6-10 years | Colored paper, markers, glue | Encourage creativity with more details like speech bubbles and backgrounds. |
Punny Valentine Cards with Simple Designs
Add some humor to your Valentine’s Day greetings with simple yet clever punny cards. Puns can add a lighthearted touch to your messages, making them more memorable and enjoyable for the recipient.

Fun Valentine’s Day Puns Kids Will Love
Kids will love creating and receiving punny Valentine cards. Some ideas include:
- Attaching small objects to cards to reinforce puns, like a tea bag with “We were MINT to be together!”
- Using stickers or simple drawings when objects aren’t practical, such as a star sticker with “You’re a STAR, Valentine!”
- Matching food-themed puns with corresponding illustrations, like “We make a great PEAR” with a pear drawing.
Matching Objects to Clever Sayings
To create punny Valentine cards, consider the recipient’s interests when choosing puns. For example, sports themes are great for athletic friends. Keep designs simple with one central pun per card for maximum impact.
| Pun | Object/Sticker | Recipient |
|---|---|---|
| “You’re a STAR, Valentine!” | Star sticker | Anyone who shines bright |
| “We were MINT to be together!” | Tea bag | Tea lovers or those who appreciate minty freshness |
| “You’re ATTRACTIVELY Valentine!” | Plastic magnet | Those who appreciate a magnetic personality |
Paper Quilled Heart Cards: An Introduction to Quilling
Paper quilling is a fun and creative way to make unique Valentine’s Day cards featuring heart designs. This ancient art form involves rolling and shaping paper strips into various forms, which can be used to create beautiful and intricate designs.

Basic Quilling Techniques for Beginners
To get started with quilling, you’ll need to learn a few basic techniques. First, you’ll need to roll paper strips into coils, which can be loose or tight depending on the desired effect. Teardrop-shaped coils are particularly useful for creating heart designs. You can also experiment with different shapes and sizes to add variety to your cards.
- Roll paper strips into tight or loose coils to create the foundation of your quilled design.
- Shape coils into teardrops, leaves, or other forms to add detail to your heart design.
- Arrange teardrop-shaped quilled pieces in a circle to form a simple heart outline.
- Fill the heart shape with smaller coils in various colors for a mosaic effect.
Creating Beautiful Heart Designs
With your basic quilling skills in place, you can start creating beautiful heart designs. Try using graduating shades of pink and red to create an ombré effect that adds depth and visual interest. You can also experiment with layering quilled designs to create a 3D effect.
| Quilling Technique | Effect | Tips |
|---|---|---|
| Simple Heart Outline | Creates a classic heart shape | Use teardrop-shaped coils |
| Mosaic Heart | Adds color and texture | Fill with smaller coils in various colors |
| Ombré Heart | Creates a gradient effect | Use paper strips in graduating shades |
By combining these techniques and experimenting with different designs, you can create stunning paper quilled heart cards that are sure to impress on Valentine’s Day.
Watercolor Valentine Cards: Easy Art for All Ages
Making watercolor Valentine cards is an enjoyable activity for people of all ages. With simple techniques and a few basic supplies, you can create beautiful, heartfelt cards that will be treasured by your loved ones.

Simple Watercolor Techniques
To start, you’ll need watercolor paints, a brush, and paper. Begin by wetting your brush and picking up some paint. Apply gentle strokes to your paper, allowing the colors to blend and merge. You can create soft, gradient backgrounds or bold, vibrant designs.
Some techniques to try include wet-on-wet, where you add wet paint to wet paper, and drybrush, where you drag a almost-dry brush across the paper. Experiment with different effects to find what works best for your card.
Adding Details with Markers or Crayons
Once your watercolor background is dry, you can add defined details with fine-tip markers or crayons. Consider drawing simple heart outlines, writing messages, or adding decorative borders. You can also use white gel pens to add highlights or detailed patterns over darker watercolor areas.
| Technique | Description | Effect |
|---|---|---|
| Wet-on-wet | Add wet paint to wet paper | Soft, blended colors |
| Drybrush | Drag almost-dry brush across paper | Textured, rough effect |
| Fine-tip markers | Add details after watercolor is dry | Crisp, defined lines |
To enhance your card further, consider adding metallic accents with gold or silver pens, or writing meaningful quotes or personalized messages in decorative lettering. With these simple techniques, you can create unique and special watercolor Valentine cards.
LEGO Stamped Heart Cards: Creative Printing

LEGO bricks aren’t just for building; they can also be used to create adorable heart stamps for Valentine’s Day cards. This creative technique allows you to add a unique touch to your handmade Valentine’s Day cards. By using LEGO bricks as stamps, you can create intricate heart designs that are sure to impress.
Building LEGO Heart Stamps
To start, you’ll need a few LEGO bricks with interesting shapes and textures. Choose bricks that can be arranged to form a heart shape. You can use washable paint applied with a foam brush for the most even coverage on LEGO brick surfaces.
Tips for Clean Printing Results
To achieve clean printing results, follow these tips:
- Press the LEGO stamp firmly and evenly onto the paper, being careful not to rock or shift it.
- Allow each stamped impression to dry completely before adding another layer or color.
- Test your stamp on scrap paper first to ensure proper paint coverage and pressure.
- Clean LEGO pieces promptly after use to prevent paint from drying in the crevices.
- Consider using ink pads designed for stamping as an alternative to paint for detailed impressions.
By following these steps and tips, you can create beautiful, one-of-a-kind Valentine’s Day cards using LEGO heart stamps. This tutorial guides you through a fun and creative process, resulting in a lovely note to give on Valentine Day.
Origami Heart Cards: Fold Your Love
With origami heart cards, you can convey your love in a uniquely folded way. Origami, the traditional Japanese art of paper folding, adds an elegant touch to Valentine’s Day cards. By incorporating origami hearts into your card designs, you can create a truly special and personalized gift.

Simple Origami Heart Instructions
To create an origami heart, start with a square piece of paper and follow a simple folding tutorial. The basic folds involve creating a triangle and then shaping it into a heart. You can find many free tutorials online that guide you through the process step-by-step.
Incorporating Origami into Card Designs
Once you have folded your origami heart, you can incorporate it into your Valentine’s Day card in various ways. Here are a few ideas:
- Glue the origami heart to the front of a blank card for a simple yet elegant design.
- Create a cascade of hearts in graduating sizes down the front of the card.
- Use contrasting paper colors to make the origami heart stand out against the card background.
- Fold tiny origami hearts to create a border around a larger central message.
- Consider leaving the origami heart unattached so the recipient can unfold it to discover a hidden message inside.
- Combine origami hearts with other paper techniques, like quilling, for more elaborate designs.
| Design Idea | Description | Skill Level |
|---|---|---|
| Simple Origami Heart | Glue a single origami heart to a blank card. | Beginner |
| Cascade of Hearts | Create a series of origami hearts in graduating sizes. | Intermediate |
| Contrasting Colors | Use different colored paper for the origami heart and card background. | Beginner |
By following these simple steps and ideas, you can create beautiful origami heart cards that will make your Valentine’s Day message even more special.
Recycled Material Valentine Cards: Eco-Friendly Options
Eco-friendly Valentine cards are a thoughtful way to express love while being kind to the Earth. By using recycled materials, you can create unique and meaningful cards that not only convey your feelings but also contribute to a more sustainable environment.
One of the joys of making Valentine cards from recycled materials is the creativity it inspires. You can transform everyday items into beautiful and personalized cards.
Creative Uses for Recycled Materials
There are numerous ways to incorporate recycled materials into your Valentine card designs. For instance, you can use magazine cutouts to create heart collages, adding a touch of color and texture to your cards.
- Transform used tea bags into delicate, stained paper hearts after drying and emptying them.
- Cut hearts from empty cereal boxes for sturdy cardboard embellishments that could also be painted.
- Repurpose bubble wrap as a stamp by applying paint and pressing onto paper for textured heart prints.
- Use old buttons arranged in heart shapes or flower patterns for dimensional decorations.
- Transform wine corks into stamps by carving simple heart shapes into the ends.
- Collect colorful thread scraps to create embroidered details on sturdy card stock.
Repurposing Household Items for Card Decorations
Household items can be repurposed in innovative ways to decorate your Valentine cards. For example, old buttons can be used to create intricate designs or patterns, adding a dimensional element to your cards.
| Material | Decoration Idea |
|---|---|
| Used Tea Bags | Stained Paper Hearts |
| Cereal Boxes | Cardboard Heart Embellishments |
| Bubble Wrap | Textured Heart Prints |
By embracing eco-friendly practices in your Valentine card making, you’re not only showing love to your friends and family but also to the planet. Get creative and have fun making your recycled material Valentine cards!

Valentine Cards with Moving Parts: Interactive Fun
Add an interactive twist to your Valentine’s Day greetings with cards that feature moving parts. These dynamic cards are sure to captivate the recipient and make your message even more special.
Creating Simple Slider Mechanisms
One way to add interactivity is by incorporating a slider mechanism into your card design. This can be achieved by cutting a slit in the card and attaching a paper strip or other material that can slide back and forth. You can use this feature to reveal a hidden message or image, adding an element of surprise to your Valentine’s Day card.
Spinning Wheel Valentine Designs
Another engaging idea is to create a spinning wheel card. To do this, cut a circular window in the front of your card and attach a rotating disc behind it using a brad fastener. Decorate the disc with various messages or images that appear in the window as it’s turned. Don’t forget to add a personal touch with decorative hearts around the window and instructions like “Spin me” to encourage interaction.

Photo Valentine Cards: Personalized Keepsakes
A photo Valentine card is a thoughtful way to express your love and share a favorite memory. It’s a personalized gift that speaks directly to the heart, making it a cherished keepsake for years to come.

Creative Ways to Incorporate Photos
To make your photo Valentine card truly special, consider these creative ideas. You can frame your photos with paper doilies for a lacy, romantic effect or use washi tape to create decorative borders around the photo edges. Adding dimensional elements like tiny paper flowers or hearts can also enhance the visual appeal.
Adding Decorative Elements Around Photos
To further embellish your photo Valentine card, you can use decorative edge scissors to create scalloped or deckled edges around your photographs. Applying glitter or metallic accents strategically can highlight certain areas without overwhelming the photo. For an elegant look, consider adding embossed details around the photo frame.
Valentine Cards for Classroom Exchanges
Making Valentine’s Day cards for the classroom is a great way to encourage creativity and kindness among students. Classroom exchanges are a fun tradition where students share Valentine’s Day cards with their classmates.
To make this activity even more engaging, consider creating cards that are not just visually appealing but also interactive and fun.
Quick and Easy Designs for Multiple Cards
For a classroom exchange, you’ll likely need to make multiple cards. Opt for simple yet creative designs that can be replicated quickly. Some ideas include:
- Using decorative tape or staples to attach small items like pencils or erasers to the cards.
- Creating slits in cards to hold small items such as stickers or temporary tattoos.
- Punching holes and using ribbon to tie small items like bouncy balls or keychains to the cards.
Attaching Small Treats or Favors
When attaching small treats or favors, it’s essential to consider the classroom setting and avoid items that might trigger allergies. Some ideas for non-food items include:
| Item | Description |
|---|---|
| Pencils | Colorful pencils with Valentine’s Day themes |
| Stickers | Heart-shaped stickers or other Valentine’s Day-themed stickers |
| Small Toys | Small toys or trinkets that fit with the Valentine’s Day theme |

By incorporating these ideas into your Valentine’s Day card-making activity, you can create a fun and memorable experience for your students.
Handprint “Blowing Kisses” Cards: Adorable Keepsakes
Handprint ‘Blowing Kisses’ Cards are a heartwarming way to celebrate Valentine’s Day with your loved ones. This craft is not only fun but also creates a lasting memory. The process involves making a handprint on a card and then decorating it to resemble a face blowing kisses.
To start, you’ll need to make a handprint on your card. For younger children, adults can assist by guiding their hands onto the paper. Once the handprint is dry, you can begin decorating.
Creating the Perfect Handprint
To create the perfect handprint, ensure that the paint or ink is not too wet or too dry. The hand should be placed firmly on the paper to get a clear print. For younger kids, it’s advisable to use washable paint.
- Use markers to draw a face on the thumb, making it look like it’s blowing kisses.
- Add small red hearts around the mouth area to symbolize the kisses.
Decorating and Adding Messages
After decorating the handprint, you can add a personal message. Phrases like “Sending you handfuls of kisses” or “Hands down, you’re the best Valentine!” are great options. Consider adding the child’s name and the date to make it a keepsake.
| Decoration Idea | Description |
|---|---|
| Decorative Borders | Use colorful borders to frame the handprint and complete the card. |
| Additional Hearts | Add more hearts around the handprint for a festive look. |

Tips for Making Your Valentine Cards Handmade Simple Yet Special
A handmade Valentine card is a heartfelt gift, and with a few simple tips, you can make it even more special. The key to creating a memorable card lies in the details and the thoughtfulness behind it.
Adding Personal Messages That Matter
Using a pen to add a personal message can make your card truly unique. Think about the recipient and what they mean to you. Write down your favorite memory together, or a reason why you love them. This will make the card a treasured keepsake.
Consider the tone you want to convey with your message. You can be funny, romantic, or heartfelt, depending on your relationship with the recipient.
Presentation Ideas for Giving Your Cards
Here are some ideas to present your Valentine’s Day card:
- Present your card in a coordinating envelope enhanced with washi tape or stickers.
- Create a custom envelope from decorative paper for an extra-special presentation.
- Pair cards with small, thoughtful gifts that complement the card’s theme or message.
- Use decorative boxes or bags to present cards along with treats or small gifts.
- Consider timing the delivery for maximum impact, perhaps with breakfast or as a surprise.
- For long-distance relationships, mail cards early with tracking to ensure timely arrival.

Conclusion
The joy of creating handmade Valentine cards lies not just in the final product, but in the process of making something with love. By investing time and thought into these simple gestures, we show care and appreciation in a way that store-bought cards cannot. Whether you’re crafting with children or making cards for loved ones, the personal touches make these handmade valentine cards truly special.
As you’ve seen, there are numerous techniques to create your own valentine cards handmade simple enough for anyone to make. From pop-up hearts to photo valentines, these ideas offer something for every skill level and age group. Consider making handmade cards a Valentine’s Day tradition that evolves as your skills and relationships grow.