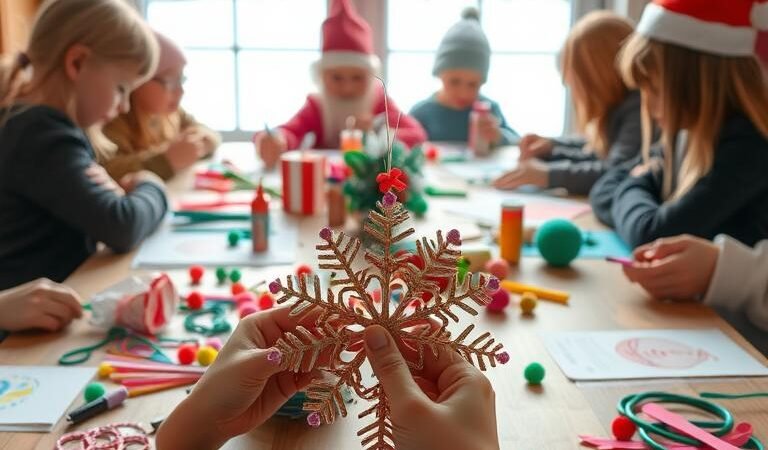
Make the season more memorable with simple projects the whole household can enjoy. These activities teach resourcefulness and turn small items into keepsakes. You’ll find nature-based ideas, pantry staples, upcycled items, and paper projects that suit any weekend.
Start with a quick scavenger hunt for pine cones, twigs, and citrus slices, then bring the finds inside to create tree ornaments and table accents. Salt dough and painted acorns use basic pantry items and take acrylic paint well.
We grouped projects by material so you can pick a project based on what you already have at home. Expect low-mess classroom options, fast setups with printable templates, and fun builds that boost fine motor skills.
Key Takeaways
- Quick wins: Simple projects that deliver festive decorations in little time.
- Group ideas by material: nature finds, cupboard staples, upcycled items, and paper supplies.
- Budget-friendly items like twine, glue, and paper make starting stress-free.
- Many projects double as gifts and help build family traditions.
- Includes low-mess classroom options and clear safety tips for a smooth craft session.
Kick off the season with 25 fun and easy ideas kids can make right now
Need a fast, fun activity? Try these easy paper and pantry projects that kids can finish today. Each idea uses basic supplies like glue, scrap cardstock, cotton thread, and a few pantry staples so you avoid extra trips to the store.
Quick-start projects: homemade crackers from toilet rolls wrapped with leftover paper; popcorn bunting dyed red or green and threaded with cotton; simple 3D bauble cards; paper plate Santa and rocking snowmen that assemble in minutes.
- Pick a one-day card or ornament to build confidence.
- Offer helper jobs like cutting shapes, sorting pieces, or reading instructions aloud.
- Label a small bin for in-progress paper parts so nothing gets lost.
Many of these grab-and-go ideas scale well for siblings, playdates, or a classroom center. They make thoughtful neighbor gifts or quick gift toppers when time is short. Set finished pieces on a tray to dry and you’ll be ready to move on to the next project with a smile.
Nature-inspired christmas crafts kids can make with sticks, pine cones, and evergreen
Bring a bit of the backyard inside with simple projects that use sticks, cones, and evergreens. These ideas highlight natural materials and tiny accents that make bright, textured decorations.

Pine cone trees with felt ball “ornaments” and jeweled stars
Hot-glue cones upright to small wood rounds, top with a jeweled star, and let kids dot Elmer’s glue to attach mini felt balls. The result looks like tiny trees and uses minimal paper or extra materials.
Twig star to hang on a door or tree
Tie five slightly flexible sticks into a five-point star with twine. Add evergreen bundles, berries, and ribbon, securing extras with a touch of hot glue for longer wear.
Cardboard wreaths wrapped with rubber bands and fresh clippings
Cut a cardboard ring and stretch several rubber bands around it. Tuck fresh greenery into the bands for a fragrant, boutique-looking wreath that’s very kid-friendly.
Painted acorn ornaments and pine cone reindeer
Paint acorns in festive color and glue caps back on so the ornament won’t shatter if dropped. Turn pine cones into reindeer by adding googly eyes, tiny twig antlers, felt ears, and a red felt nose—simple glue placement makes big smiles.
Mini tree garland, twig snowflakes, and clay keepsakes
Cut small cardboard trees, glue cedar on them, and decorate with felt balls, sequins, and star jewels; hot-glue each piece to twine. Make twig snowflakes by arranging trimmed sticks into six-point shapes and add jute for hanging.
Press evergreen needles into air-dry clay shapes, pierce a hole, then let cure and loop with twine for a textured keepsake.
Dried citrus and stamped wood slice ornaments
Bake orange or grapefruit slices at 200°F for 6–8 hours and string with twine. Stamp wood slices with snowflakes or sprigs using an ink pad, then add twine to hang—minimal steps, polished results.
Kitchen and cupboard crafts: salt dough, dried citrus, snow globe, and more
Turn pantry staples into memorable decorations and small gifts with projects that smell great and look polished. These activities use common items and keep setup low-stress.

Salt dough is a fail-safe starting point. Mix 2 cups flour, 1 cup salt, and about 1 cup water until a soft dough forms. Roll, cut shapes with cookie cutters, bake on low heat until firm, then cool before painting. Acrylics stick best to finished pieces.
Quick project ideas
- Salt dough ornaments: cut trees, stars, and snowflakes; seal with clear coat to keep them lasting.
- Dried orange and lemon slices baked slowly pair beautifully with cinnamon sticks, bay leaves, or rosemary for garlands or gift toppers.
- Make a small glittery snow globe using a watertight jar, a waterproof miniature, and cosmetic-grade glitter; test the lid seal before gifting.
- Color popcorn red and green, let it dry, then thread with cotton to make nostalgic bunting for mantels or windows.
- Assemble a tea advent: portion loose-leaf blends into numbered paper pouches, add brewing notes, and bundle as thoughtful gifts.
Store dough ornaments and dried citrus in airtight containers. Use spare jars, paper bags, and leftover herbs to keep costs down and make these kitchen craft ideas more sustainable.
Upcycled christmas crafts: toilet rolls, craft sticks, paper plates, and clothespins
A few toilet paper tubes and craft sticks can become family-favorite tabletop scenes. These upcycled projects keep setup quick and cost low while teaching kids how to reuse paper goods and scraps.

Easy builds: Transform a toilet roll into Santa pants, a chimney scene, or a windsock by wrapping, painting, and adding simple paper details. Lolly and craft sticks paint quickly and glue together into tiny trees that pop with pom-pom “ornaments.”
Clothespin snowmen are perfect as place-card clips or tree ornaments. Paint pins white, draw faces with markers, and add felt scarves or button accents. Paper plates make cheerful Santa faces or rocking snowmen that wobble on a curved base—kids love the motion.
- Repurpose one toilet roll per child to keep waste low and smiles high.
- Set out a tray with glue, scissors, markers, and extra paper so everyone can jump in.
- Use a single unusual piece—foil, a button, or a scrap ribbon—to spark creativity.
- Reinforce joins on thin sticks with a tiny extra dab of glue to make decorations last.
These simple upcycled projects make charming mantel garlands and gift toppers. They turn everyday paper into keepsakes while letting siblings share assembly and decorating tasks.
DIY Christmas Crafts for Kids: ornaments, keepsakes, cards, and reindeer ideas
Simple touches—mini hats, stamped wood slices, and playful reindeer—bring warmth to any tree. These projects balance quick wins with keepsake potential and make great little gifts or classroom swaps.

Mini yarn hat ornaments
Wrap yarn around a small ring or bottle neck, gather and tie the top, then trim to shape. These tiny hats sit lightly on branches and pair well with stamped wood ornaments as a bundled gift.
Handprint salt dough keepsake
Press a small hand into salt dough, bake until firm, and paint with acrylics. Seal once dry to preserve detail and add a year and name for a lasting family memory.
Fingerprint tree ornament and 3D cards
Stamp rows of fingerprints in green acrylic to form a small tree; sign and date each one to track growth. Make matching 3D bauble cards from folded paper so a flat card opens into pop-up balls that delight mail recipients.
Reindeer creations and paper ideas
Try corner bookmark reindeer, paper rosette decorations, or toilet-roll reindeer for classroom-ready projects. Keep glue light and avoid heavy embellishments so paper pieces lie flat when mailed or tucked into gift bags.
Quick checklist
- Wrap yarn tightly and tie knots small so hats hang neatly.
- Bake salt dough on low heat and let cool fully before painting.
- Use archival ink on wood slices and a clear sealant to protect stamps.
- Write a short note inside each card to make it a sweet gift.
| Project | Key Supply | Time | Best Use |
|---|---|---|---|
| Mini yarn hats | Yarn, small ring | 10–15 min | Tree ornaments, teacher gifts |
| Handprint salt dough | Flour, salt, acrylic paint | 1–2 hours (including bake) | Keepsake, gift tag |
| Fingerprint tree ornament | Paint, round blank | 15–30 min | Annual family series |
| Reindeer paper set | Paper, glue, markers | 20–30 min | Cards, bookmarks, classroom exchange |
Classroom-friendly crafts: quick, low-mess activities with printable templates
Template-based projects reduce prep and let children focus on color and fine motor play. Printable puppets and one-page photo templates keep setup minimal and help teachers control mess while students stay engaged.

Paper plate trees work well at centers. Teachers can pre-form cones so each child only decorates. Use stickers, small pom-poms, or marker dots to practice fine motor skills.
Printable puppets and paper plate trees
Provide clear, visual instructions at each table so students follow steps independently. Offer a snow-themed prompt—like adding a paper snowflake or a simple snow scene—to tie vocabulary to the activity.
Craft stick ornaments and nature-touch cards
Glue tiny sprigs or leaf shapes onto cards to add tactile interest with very low mess. Choose fast-drying adhesives and pre-cut shapes to speed work at shared stations.
“Use color-coded bins and one-page instructions to keep transitions smooth and supplies controlled.”
- Set color-coded bins (paper, sticks, glue, scissors) to speed access.
- Give optional templates of different complexity for age groups.
- End with a quick gallery walk so students share decorations and build confidence.
- Assign pack-up roles like supply captain and table wiper to streamline cleanup.
| Activity | Key Prep | Time | Best Use |
|---|---|---|---|
| Printable puppets | Pre-printed templates, sticks | 15–25 min | Centers, reading prompts |
| Paper plate trees | Pre-formed cones, stickers | 10–20 min | Fine motor practice |
| Nature-touch cards | Pre-cut card bases, sprigs | 15–30 min | Low-mess sensory cards |
Materials, setup, and safety: the smart way to craft with kids
Start by gathering a simple kit of everyday supplies so projects move smoothly and children stay engaged.

Core materials include paper, craft sticks, cotton balls, twine, and a small box of natural items like pine cones and evergreen sprigs. Keep these ready in labeled bins to speed setup.
Essentials and quick setup
Build a starter kit with assorted paper weights, craft sticks, cotton for snowy texture, and a tiny jar of sequins. Pre-portion beads and buttons into cups and add simple instructions cards at each station.
Safety and timing
Use school glue for most joins and reserve a hot glue gun for adults only. Let grown-ups handle the gun and oven tasks while children place pieces and decorate.
“Test-fit lids before filling a snow globe, then seal tightly to avoid leaks.”
| Item | Purpose | Best practice |
|---|---|---|
| Paper (assorted) | Cards, cut-outs | Label weights and store flat |
| Cotton balls | Snow texture | Pre-bundle in small bags |
| Twine & craft sticks | Hanging, structure | Keep scissors and tape nearby |
| Salt dough & citrus | Keepsakes, dried slices | Bake citrus at ~200°F, flip often |
Wrap-up tip: Allow enough time for drying and baking. End each session with a two-minute reset: cap glue, return tools, and sweep scraps so the space is ready next time.
Conclusion
, Pick one quick paper project and one keepsake to try this week so handmade pieces start appearing on your christmas tree right away.
Nature ideas like twig stars and dried citrus (baked at ~200°F for 6–8 hours) add scent and texture while keeping costs low.
Salty kitchen projects—salt dough ornaments painted with acrylics—become family heirlooms. Fingerprint dough ornaments make an easy growth timeline on the tree.
Bundle a few pieces as small gifts or tuck a reindeer card with a handwritten note into a package to spread cheer beyond your home.
Rotate finished decorations around the house, add a few to wrapped presents, then sweep supplies into labeled bins so the next session starts stress-free.
Enjoy the process: a little time, simple paper shapes, and a playful spirit are all it takes to make bright memories under the tree. Bookmark this list and craft on—wishing your family a cozy, creative season filled with laughter and warm decorations.