Ready to turn tiny blooms into lasting keepsakes? This friendly guide walks you step by step through simple projects that highlight botanical beauty. You’ll learn how to press and store delicate pieces, choose safe adhesives and sealants, and pick the best blooms for flat, lasting results.
From quick paper projects to glass, clay, and jar decor, these ideas fit evenings or weekend sessions. Expect clear tips for bookmarks, coasters, floating frames, lantern jars, and suncatchers. I include beginner-friendly methods and options for more refined artful displays.
Most supplies are easy to find—cardstock, recycled jars, double-pane frames, and air-dry clay—so projects stay budget-friendly. Whether you want a heartfelt gift or a small accent for your home, these projects offer a creative way to bring nature indoors.
Key Takeaways
- Simple techniques make preserved blooms usable in many DIY projects.
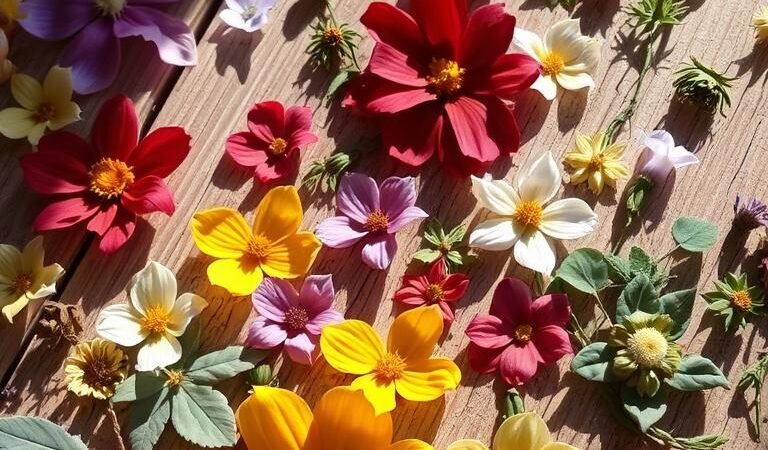
- Choose flat blooms like violets and daisies for best results.
- Use pH-neutral adhesives and gentle sealing to protect color.
- Projects range from paper bookmarks to durable glass decor.
- Most supplies are affordable and easy to source in the U.S.
- Ideas suit beginners and experienced makers alike.
Welcome: Get Creative with Pressed Flowers at Home
Gathering simple botanicals and pressing them opens up a gentle, creative pastime for the whole family. This guide shows how a short walk in nature can turn small finds into lasting keepsakes.
Perfect for families, hobbyists, and first-time makers, these projects connect outdoor play with low-cost, table-top fun. Kids and children can pick petals and leaves, then help arrange them into bookmarks, suncatchers, and simple framed pieces.
The list is organized by skill and time. Quick, child-friendly ideas sit next to more detailed decor you can tackle on a weekend.
- Easy projects for a 15–30 minute session.
- Intermediate pieces for a relaxed afternoon.
- Display-worthy items for a weekend build.
Gathering botanicals from your garden or a special spot adds personal meaning. These activities use common supplies and fit neatly on a kitchen table.
Ready to pick a project? Choose something that matches your time today, whether a swift bookmark or a mounted piece for the wall. Later sections cover the right way to prepare botanicals, safe adhesives, and display tips to keep your work looking fresh.
How to Press Flowers the Right Way Before You Craft
Good drying makes projects easier and results cleaner. Take a little care up front and you’ll get flat, colorful pieces that hold up when glued to paper or sealed under contact paper.
Book vs. Microwave: timing and results
The classic book method takes about 2–3 weeks. Change blotting paper every few days to control moisture. This yields consistently flat pieces with strong color.
Microwave pressing shortens that time but needs trial and error. Use low power, short bursts, and a heat‑safe sandwich of absorbent paper to avoid scorching or steam traps.
Using a dedicated press and choosing botanicals
A simple flower press uses layers of cardboard tightened with bolts. It gives even pressure and airflow, creating crisp results after a few weeks.
Pick naturally flat blooms and thin leaves—violets, daisies, black‑eyed Susans, and Queen Anne’s lace work well. Trim bulky stems and harvest in the morning once dew dries. Pat pieces gently to reduce the risk of greenish‑brown stains or mold.
- Consistent pressure + dry blotting paper + ventilation help preserve color.
- Label batches with dates and names to learn what presses best.
- Pre‑pressed assortments are a handy option if you lack seasonal access.

Essential Tools, Glues, and Sealants for Pressed Flower Crafts
Good tools and a light touch matter more than fancy supplies. A few reliable items will make most projects smooth and long-lasting.

Must-have kit and why minimal glue wins
Basic tools: fine tweezers, micro scissors, soft brushes, a clean cutting mat, and a detail brush or cocktail sticks for glue control.
Use tiny dots of adhesive on sturdy parts—centers, sepals, stems, or leaf bases. This stops show-through, curling, and staining on thin petals.
Glues, Mod Podge, and application tips
Mod Podge is popular and versatile, but it can shift some blooms toward greenish-brown and may stay slightly tacky. Always test on scraps first.
Better choices: PH-neutral white glues or UHU non‑solvent all-purpose glue give cleaner, more stable results. Apply with a cocktail stick or a fine artist brush for precision.
Sealants, varnish, and display cautions
Vallejo Polyurethane Gloss Varnish (also available in matte) gives a thin protective coat for paper, jars, and clay. Even UV-resistant sealants won’t stop gradual fading.
Too much sealant causes blotches or petal curl. Work in thin coats, allowing full drying between layers. For clay, use clay-specific varnish to avoid discoloration from porous surfaces.
“Test a small swatch first—materials and botanicals react differently, so a trial saves a full project.”
| Item | Best for | Notes |
|---|---|---|
| Fine tweezers | Placement | Gentle grip, avoids crushing petals |
| PH-neutral glue / UHU | Paper & mixed media | Less staining, strong bond |
| Vallejo varnish | Coasters, jars, clay | Thin coats; test for color shift |
| Micro scissors & brushes | Trim & detail | Precision cuts; small glue dots |
Display cautions: Keep finished pieces out of direct sun, humid bathrooms, and hot windowsills. Heat and moisture speed discoloration and invite mold.
Before finishing a full project, always try a small swatch. That one step will save time and ensure your pressed flower work stays bright and stable.
Pressed Flower Crafts
Simple projects make it easy to bring nature indoors. Try low-cost ideas that you can finish in an afternoon. Many use common supplies like cardstock, contact paper, PH-neutral glue, and recycled jars.

Quick-start picks from paper to glass to clay
Choose one small project to begin: greeting cards, bookmarks, jar lanterns, floating frames, air-dry clay ornaments, and suncatchers all work well.
- Paper: cardstock, a tiny brush, and minimal glue make cards and tags fast.
- Jars & frames: apply small clusters on corners for balanced looks and easy displays.
- Clay: press a single bloom into air-dry clay, varnish after full cure; this may need two sessions.
Fastest one-sitting ideas: bookmarks and suncatchers using contact paper. Longer pieces like varnished trinket dishes need drying time.
Try using pressed flower elements in small, high-impact clusters at edges. This creates balance without overwhelming the surface.
Test one piece first. Make a single bookmark or jar to dial in glue amounts and placement before making gifts. Keep a small tray of sorted pieces by color and size to speed workflow.
If kids are helping, contact paper offers a no-glue option that’s tidy and quick.
Paper Craft Favorites: Cards, Gift Tags, and Handmade Paper
Make rustic, personal paper pieces that highlight tiny botanicals. Use simple tools and a calm layout to turn pressed blooms into keepsakes for gifts or home use.

Greeting cards and tags on Kraft or cotton paper
Start with sturdy cardstock—250gsm 5″x7″ cards give a stable base. Plan a minimal composition and place tiny glue dots on centers, sepals, stems, or leaves to avoid show-through on thin petals.
Kraft or recycled cotton paper adds a warm, textured look that pairs well with small clusters. If mailing, tuck a slip of waxed paper or tissue over the design inside the envelope to protect fragile edges.
Handmade paper with embedded petals
To make rustic sheets, blend scrap paper into pulp, dip a deckle, and sprinkle thin petals and leaves into the wet surface for a speckled, tactile finish. Let dry flat and press lightly before trimming.
- Design ideas: tiny garlands, floral initials, and asymmetrical corner vignettes for refined gift cards.
- Turn offcuts into bookmarks: guillotine-cut edges and round corners for comfort.
- Punch light shapes—hearts or circles—from scraps to create coordinated labels and tags.
| Step | Materials | Tip |
|---|---|---|
| Card base | 250gsm cardstock, Kraft or cotton paper | Choose textured stock for rustic appeal |
| Placement | Tweezers, micro‑brush, waxed paper | Glue robust points only to reduce staining |
| Sealing | Light varnish or contact layer (optional) | Leave exposed for texture; seal for mailing |
| Finishing | Guillotine, corner punch, tags | Create matching sets from offcuts |
Jar Magic: Lanterns, Tea-Light Holders, and Vases with Pressed Flowers
Turn ordinary glass jars into glowing lanterns or bold vases with a few simple supplies. Clean jars well, remove labels, and dry fully before you begin. Decide if you want a clear-glass glow for lanterns or an opaque-painted finish for a vase that hides stems.

Choose flexible, flatter blooms and small leaves so pieces conform to curved glass without cracking. If the jar is brittle or heavily curved, pick thinner botanicals and trim stems short.
- Attachment options: apply a thin, even layer of PH-neutral glue to the glass for a long-term hold.
- Low-mess route: use contact paper as a repositionable cover that still lets light shine through.
- Lantern idea: test-fit flameless tea lights, then arrange small clusters of buttercups or daisies in spaced panels to let the glow show through.
- Vase finish: paint two coats of acrylic for opacity, let dry fully, then glue botanicals and add a very light sealing coat for durability.
Safety note: use flameless tea lights to avoid heat exposure and discoloration, especially on jars with dense botanical coverage.
Style ideas: group several jars at different heights on a tray or line a shelf with three painted vases sharing a color story. Finally, place finished pieces away from drafts and direct sun to protect the look and extend the life of delicate surface designs.
Display Worthy: Floating Frames and Mounted Art
Double-pane frames let the smallest blooms float with a museum-like feel. They show both sides of a petal and create a light, modern display that suits many rooms. Pick very flat pieces so the panes close cleanly.

Planning composition and placement
Lay out your design on a white sheet or directly on clean glass. Use tweezers to refine spacing until balance feels natural.
Work in small groups or a single focal part to keep the eye moving. Less is often more with delicate botanicals.
Glue technique to avoid discoloration
Use tiny dots of PH‑neutral adhesive on sturdy spots—centers, sepals, stems, or thicker leaves. This keeps glue invisible and reduces halos under thin petals.
Avoid smear gluing across translucent areas. Test on scraps to confirm no darkening occurs.
Sealing, glass choices, and humidity control
UV‑resistant glass slows fading but won’t stop it. Pair UV glass with shaded placement to extend vibrancy.
For backed, mounted art use recycled cotton paper as a substrate for thicker pieces, then seal edges with copper foil or conservation-grade framing tape to limit humidity and dust. Floating frames often can’t be fully sealed—hang them away from bathrooms, kitchens, or bright windows.
| Frame Type | Best Use | Protection Notes |
|---|---|---|
| Double‑pane floating | Airy, minimal displays | Great visuals; avoid humid rooms |
| Mounted behind backing | Thicker botanicals, gallery look | Can be sealed with foil or archival tape |
| UV glass framed | Longer color retention | Combine with shaded placement |
Clay and Ceramic Keepsakes: Ornaments, Trays, and Coasters
Air-dry clay gives you quick, custom shapes that turn into lasting ornaments and trays. Roll clay to an even thickness, cut clean shapes with cookie cutters, and smooth edges before setting pieces on a flat board to dry.

Air-dry clay shapes, trinket dishes, and seasonal pieces
Before drying, use a straw to punch hanging holes for ornaments so openings stay neat and centered. For shallow dishes, lay cut shapes into a rounded bowl lined with plastic wrap to form trinket dishes that keep their curve as they harden.
Important: let clay fully harden and rotate pieces per manufacturer instructions before adding botanicals. Gluing too soon can trap moisture and cause cracking or discoloration.
Unglazed ceramics with pressed blooms and glossy finishes
Use minimal glue—tiny dots at stems or leaf bases—to attach blooms to unglazed ceramic blanks. Test a clay-specific varnish on a scrap to confirm color stability and avoid saturating petals with sealant.
- Keep coaster and tray designs minimal; place motifs where cups won’t rub.
- Seasonal shapes—pumpkins, hearts, stars—make sweet ornaments and personalized gifts.
- Store finished pieces away from steamy rooms to prevent moisture seepage and cloudy finishes.
| Project | Key step | Drying note |
|---|---|---|
| Ornaments | Cut shapes, punch hole with straw | Dry fully; rotate for even cure |
| Trinket dishes | Mold in bowl lined with plastic wrap | Let set flat until rigid before demolding |
| Coasters & trays | Keep motifs away from high-wear areas | Test varnish; seal lightly after full cure |
| Unglazed ceramic blanks | Attach blooms with tiny glue dots | Finish with thin glossy coat; test first |
Bookmarks That Last: Simple Gifts Using Pressed Flowers
Make simple, gift-ready bookmarks with a clean workflow that minimizes glue and maximizes color retention. Bookmarks live tucked inside books, so the pieces avoid direct sun and hold color longer. A tidy process saves time and keeps delicate bits flat.

Contact paper vs. lamination and corner rounding tips
Cut clean bookmark blanks first. Use a guillotine or ruler and craft knife to make even paper strips. Arrange small clusters and glue tiny dots only on centers or stems to avoid show-through.
Sealing options: transparent contact paper gives low-heat protection and is safe for most botanicals. Laminators can run hot and may discolor some pieces—test a spare sample before laminating full batches.
Use a felt-edge squeegee when applying contact sheets; work slowly from center to edges to push out bubbles. Round corners with a corner punch and add a small hole for a tassel or ribbon for a polished, gift-ready finish.
- Color-coordinate paper and botanicals for matching sets; tie with twine for quick gifts.
- Recycle offcuts from card projects into bookmarks to reduce waste and build suites.
- Leaving botanicals unsealed gives a tactile feel but needs gentle handling; use a light topcoat if the bookmark will see heavy use.
- Store extras flat in a clean envelope or organizer drawer until gifting.
Sun-Filled Decor: Suncatchers and Window Art
Catch sunlight in a circle of color by making simple suncatchers from contact film and a thin cardboard ring. This no-mess activity uses lightweight botanicals, clear contact paper, and basic household tools.

Start on a clean surface and use tweezers to place pieces so small gaps let light pass. Trace a ring on thin cardboard, cut two matching circles of contact paper, then arrange tiny blooms and leaves on one sheet.
Sandwich the second contact sheet over the arrangement and trim the edge to the cardboard. Hang the finished circle with clear thread near a bright place or press it to glass as a cheerful window decoration.
- Try seasonal themes—spring blooms, autumn leaves, or snowflake layouts—to rotate decorations through the year.
- Layer translucent paper behind botanicals for subtle color accents without extra weight or heat-sensitive glue.
- Store suncatchers flat between backing sheets to avoid dust, creases, and bending when not in use.
- Quick family activity: pre-cut rings and small assortments let kids assemble their own in minutes.
Note: prolonged direct sun will fade colors over time. Rotate displays and move pieces occasionally to extend vibrancy and keep your glass panes looking fresh.
Cozy Glow: Pressed Flower Candles and Night Lights
Turn simple wax candles and recycled jars into cozy accent pieces for your home.

Pillar technique: warm a knife briefly over a small flame, then use the hot edge to soften a thin patch of wax. Press a small bloom or single petals into that softened area. Rewarm the surface gently so the design locks flush to the candle.
Work in small sections to avoid drips or discoloration. Let each patch cool before moving on. Overheating can cause runs or dark spots, so keep flame time short.
- Use sparse arrangements—single stems or tiny clusters—to show silhouette and lower heat stress.
- Pair decorated pillars with jar night lights using flameless tea lights for a safe, soft glow.
- Wrap finished pieces in tissue and a snug box if you plan to give them as a gift.
Place candles and jar lanterns away from drafts and direct sun to protect wax and botanicals. Try a practice candle first to perfect temperature and pressure before making a set for a centerpiece or present.
Seasonal Fun: Easter Eggs, Ornaments, and Pumpkin Decor
Celebrate the seasons with small, sentimental projects that turn simple finds into holiday-ready accents. These quick ideas suit family weekends and make sweet gifts.

Blown-egg decor: Pierce a tiny hole at top and bottom, blow out contents, then dry for several days. Glue delicate pieces in small motifs that follow the curve of the shell. Work in light layers so shells stay smooth.
Salt dough ornaments for keepsakes
Mix 2 cups flour, 1 cup salt, and 1 cup water. Knead, roll to about 1/4″ thickness, press botanicals gently, and use a straw to make hanging holes.
Bake at 120°C until firm. Cool, then add a light seal if desired. Stars, hearts, bells, and snowflakes make lovely shapes for garlands or trees.
Pumpkins and seasonal vases
Dress faux or small real pumpkins with sparse botanical clusters. Seal very lightly to keep texture and color. For a coordinated mantel, add a band of blooms near a vase neck or base.
| Project | Key step | Storage tip |
|---|---|---|
| Blown eggs | Pierce, empty, dry, glue tiny motifs | Store in egg cartons with tissue |
| Salt dough ornaments | Roll 1/4″, press pieces, bake low | Keep flat in cool, dry boxes |
| Pumpkin accents | Apply small clusters; seal lightly | Wrap individually in tissue for year-round care |
Care tip: Pack seasonal decorations in cool, dry boxes with tissue between items to protect fragile surfaces and keep them lovely for years.
Playful Projects: Rocks, Tic-Tac-Toe, and Kids’ Nature Activities
Turn simple finds from a walk into playful, portable projects the whole family can enjoy.
Decorated rocks make cheerful games and tiny displays. Select smooth stones, arrange small petals or leaves into motifs, and seal lightly with a thin varnish. Kids can handle these as game markers or shelf accents.

Decorated rock games
Create a tic-tac-toe set with ten stones: five for each team. Use distinct motifs or colors for each side and pack a cloth grid for a portable play mat.
Simple nature activities for children
Make cardboard tube binoculars for scavenger hunts. For window art, arrange petals on contact film to form butterfly wings and seal with another sheet.
- Decorate hiking sticks with small botanical clusters and ribbon wraps to make walks more engaging.
- Try transient petal art on a shallow tray to build fine motor skills and pattern recognition.
- Supervise cutting and hot tools; let younger kids arrange and glue under adult guidance.
| Project | Age range | Care & storage |
|---|---|---|
| Rock tic-tac-toe | 5+ | Store in drawstring bag; keep dry |
| Cardboard binoculars | 3–8 | Reinforce with tape; dry between uses |
| Butterfly contact wings | 4+ | Display on window; avoid direct sun |
| Decorated hiking stick | 6+ | Wrap ribbons; dry and store indoors |
Tip: keep sets in a soft bag and move outdoor pieces inside after wet weather to prolong color and finish.
Wearables and Everyday Accessories: Phone Cases and Glass Lockets
Turn everyday accessories into tiny keepsakes by layering slim botanicals beneath a clear case or inside a glass locket. Start with a clean, light-colored phone case so colors show and glue holds faster.

Prep the case: wipe oil and dust off, plan a slim layout, and select very flat pieces to keep the surface smooth. Apply tiny dots of craft glue on stems or thicker spots only, then press gently and let cure fully before fitting the phone back.
For lockets, place tiny blooms or fern tips inside the clear glass and secure a micro drop of glue on the back if needed. These small glass keepsakes make a thoughtful gift for birthdays or thank-you swaps.
- Choose flat minis so pockets and bags won’t snag the design.
- Create themed sets—birth month flowers, school colors, or favorite palettes—for a personal match.
- Avoid prolonged heat exposure (cars, sunny windowsills) to preserve adhesion and color.
| Item | Tip | Cure Time |
|---|---|---|
| Phone case | Seal edges lightly; thin layers | 24–48 hours |
| Glass locket | Use micro glue drop at back | 12–24 hours |
| Themed set | Coordinate colors and sizes | Allow full cure before packaging as a gift |
Tip: when using pressed flowers, test one piece first to confirm no color shift from glue or sealant.
Safety, Storage, and Long-Term Care for Your Pressed Flower Collection
A simple, dry organizer will keep your pressed pieces crisp and ready to use. Store botanicals flat between clean sheets in a cool drawer so dust and bends don’t harm petals. Dryness before storage is vital to avoid greenish-brown shifts and mold.

Preventing discoloration, curling, and mold over time
Keep pieces crisp-dry before crafting. Humidity, heat, and wet adhesives cause curling or discoloration. Use minimal, precise glue and allow full drying before sealing or framing.
Organizer ideas, floating frame caveats, and resin notes
- Store your collection in shallow boxes or archival envelopes, separated by clean paper to stay flat and dust-free.
- Backed frames can be sealed with copper foil or archival tape; double-pane, floating frames cannot be fully sealed—place them away from kitchens and bathrooms.
- Resin can encase botanicals for long life, but it demands careful mixing, curing, and safety steps; beginners should research techniques first.
| Problem | Fix | Tip |
|---|---|---|
| Mold | Discard damp pieces; re-press new, fully dry ones | Label dates to track moisture risk |
| Fading | Rotate displays; keep out of direct sun | Use shaded rooms and UV glass |
| Curling | Use tiny glue dots at stems or bases | Avoid heavy water-based adhesives |
Pro tip: document plant type and press date so you learn which flowers keep color best over time and which need special care.
Conclusion
Close your session with a quick project—one bookmark or card—and you’ll learn more than you expect.
There’s a project for every skill level: from simple cards and pressed flower bookmarks to small frames, candles, and clay pieces. Try the book method or a press, then scale up as you gain confidence.
Care matters. Keep finished pieces out of humid spots and harsh sun, use light glue and thin seals, and consider UV glass for special framed art to slow fading.
These makes also work as heartfelt gift ideas—try a candle set, seasonal ornaments, or a personalized initial frame. Experiment with layouts and refresh your collection with the seasons to keep your home displays fresh.