I’m excited to share my favorite paper craft projects that are not only adorable but also incredibly simple to make. These fun and creative crafts are perfect for crafters of all skill levels, requiring minimal materials.
From stunning 3D decorations to practical items you can use every day, this collection covers a wide range of paper crafting techniques and styles. I’ve personally tested these projects and can vouch for their simplicity.
Whether you’re a seasoned crafter or just starting out, you’ll find these crafts to be a great way to express your creativity and have fun while doing it.
Key Takeaways
- Discover simple and fun paper craft projects for all skill levels.
- Learn how to create stunning 3D decorations and practical items.
- Explore a wide range of paper crafting techniques and styles.
- Get expert tips and material recommendations for successful crafting.
- Find out how to impress your friends and family with your creative skills.
The Joy and Benefits of Creating Cute Easy DIY Paper Crafts
Engaging in Cute Easy DIY Paper Crafts has been a game-changer for me, offering a creative outlet that’s both fun and fulfilling. Paper crafting can be enjoyable for people of all ages, keeping kids preoccupied while encouraging them to express themselves creatively.
I’ve found that paper crafting offers so much more than just a fun way to pass the time. It’s a therapeutic activity that reduces stress and enhances mindfulness as you focus on creating something beautiful. One of the greatest benefits of paper crafts is their accessibility – unlike other craft forms that require expensive equipment or specialized skills, paper crafting is affordable and approachable for everyone.
- Creating paper crafts with family members creates meaningful bonding experiences and treasured memories, while also helping children develop fine motor skills, patience, and creative problem-solving abilities.
- I love how paper crafting encourages sustainability – you can repurpose old magazines, newspapers, and packaging materials into stunning creations, reducing waste while making beautiful art.
- The sense of accomplishment you feel when completing a paper craft project boosts self-confidence and provides a creative outlet for self-expression, allowing you to develop your unique style and artistic voice.
- These cute easy DIY paper crafts also make thoughtful, personalized gifts that show recipients you’ve invested time and care into creating something special just for them.
As I continue to explore the world of paper crafting, I’m reminded of the joy and benefits it brings to my life. It’s a hobby that’s not only fun but also enriching, providing a creative outlet that’s hard to find elsewhere.
Essential Materials and Tools You’ll Need to Get Started

The art of paper crafting necessitates a thoughtful selection of supplies and equipment. While some projects may vary in difficulty and requirements, certain tools are staples in the world of paper crafting.
To start, a good quality pair of scissors is essential. I recommend looking for ones with comfortable grips and sharp blades that can handle detailed cutting work without causing hand fatigue. The Slice® Ceramic Scissors (Small) are an excellent choice, being easy to wield, lightweight, and safe for little fingers.
Different types of adhesives serve different purposes in paper crafting. I use liquid glue for precision work, glue sticks for large surfaces, double-sided tape for clean joins, and hot glue when I need something to set quickly.
Paper selection is crucial for successful projects. I keep a variety on hand, including standard construction paper, heavier cardstock for structures, origami paper for folding projects, and decorative patterned papers for accents.
Basic measuring and scoring tools make a huge difference in the precision of your work. I recommend a metal ruler with a non-slip backing, a bone folder for crisp folds, and a scoring board if you’ll be doing lots of folding projects.
While not essential, a few specialty tools can elevate your paper crafting: paper punches in various shapes, a paper trimmer for straight cuts, and a craft knife with a self-healing mat for intricate cutting work. Don’t forget organizational supplies like clear plastic bins, small containers for embellishments, and project folders to keep templates and works-in-progress organized.
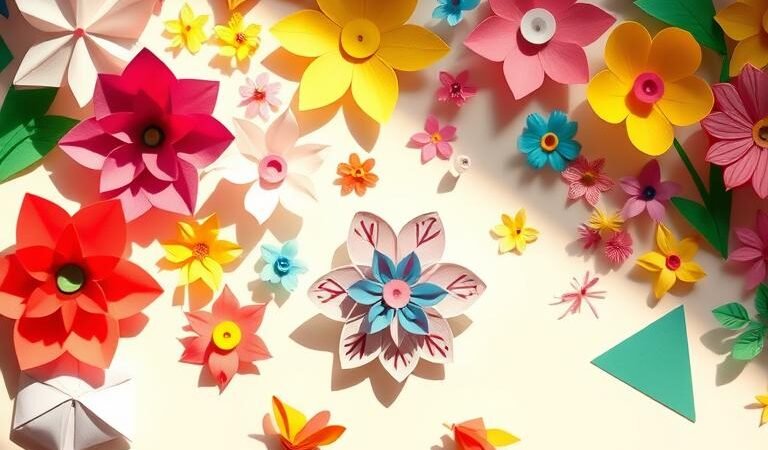
Gorgeous Paper Flowers That Last Forever
Creating paper flowers is a delightful craft that brings beauty and elegance to any room. Paper flowers make every room look sleek and stylish, and they’re a timeless decorative staple.

1. Paper Gerbera Daisies
Paper Gerbera Daisies are one of my favorite paper flowers to make because their layered petals create a realistic 3D effect. To make them, you’ll need medium-weight colored paper that holds its shape well but isn’t too stiff to curl and shape the petals naturally.
To create Paper Gerbera Daisies, follow these steps:
- Download and print a flower template.
- Cut out all the pieces you’ll need to assemble the flowers.
- Overlap the flower petals by gluing them together.
| Materials Needed | Optional Materials |
|---|---|
| Scissors | Dowel |
| Craft Glue | Wonder Clips |
| Pencil | |
| Flower Template |
2. Accordion-Folded Flowers
Accordion-folded flowers offer a completely different aesthetic with their pleated texture and can be made in minutes with just a square of paper and some simple folding techniques. The key to creating realistic-looking paper flowers is in the details – I always take time to curl petal edges, add texture with scoring tools, and create dimension by varying the height of different elements.
Both these flower designs can be mounted on stems made from floral wire or wooden dowels wrapped in green paper tape, allowing you to create entire bouquets that will brighten your home indefinitely.
Delightful Paper Animals and Creatures
Bringing paper animals to life is a wonderful way to spend your time, and it’s an activity that can be enjoyed by people of all ages. I find that creating paper animals is not only a fun project but also a great way to develop your crafting skills.

Paper animals and creatures are among the most charming paper crafts to create, offering endless possibilities for customization through color choices and personal design touches. Two delightful projects that stand out are origami paper birds and the paper chain snake.
Origami Paper Birds
Origami paper birds are classic folded paper creations that require no glue or cutting – just precise folding techniques that result in elegant birds that can be displayed individually or strung together as mobiles. When making origami birds, I recommend using authentic origami paper which is thin yet strong, with different colors on each side for a more interesting finished product.
Paper Chain Snake
The paper chain snake is a perfect project for crafting with kids – it teaches basic paper chain techniques while creating a playful toy that can be customized with different patterns and colors. To make a paper chain snake, you’ll need construction paper, scissors, glue, felt tip markers, and a printable snake template. By following the steps to create the snake, you’ll not only have a fun toy but also develop sequencing skills and understanding of patterns.
| Craft Project | Skills Developed | Age Suitability |
|---|---|---|
| Origami Paper Birds | Patience, Precision | 8 and above |
| Paper Chain Snake | Sequencing, Pattern Understanding | 5 and above |
Both these animal crafts teach important skills and are enjoyable to make. Whether you’re crafting with kids or enjoying some solo creative time, these paper animals are sure to bring a smile to your face.
Stunning 3D Paper Decorations for Your Home
Transform your living space with stunning 3D paper decorations that add a touch of elegance and whimsy. I’m particularly fond of 3D paper decorations because they transform flat paper into dimensional objects that add depth and interest to any space in your home.

3D Paper Stars
One of my favorite projects is creating 3D paper stars. You can make these glitzy decorations with your little ones for a fun and easy arts and crafts session. To get started, you’ll need colored cardstock, a Cricut Scoring Wheel, and a 3D Stars Template.
The process involves accessing the 3D Star files in Cricut Design Space, which will guide you on the appropriate tool to use based on your material. For instance, you might use a Single Scoring Wheel for regular cardstock or a Double Scoring Wheel for coated cardstock. After cutting out your stars, simply fold them and display for a bit of sparkling magic.
Paper Ball Garland
Another versatile decoration is the paper ball garland. These can be customized for any color scheme or occasion, making them perfect for various celebrations. To create a paper ball garland, you’ll need to glue strips of paper together at the center point, requiring precision and a small dot of glue.
Both 3D paper stars and paper ball garlands are not only beautiful but also practical. They store flat when disassembled, making them ideal for seasonal decorating without taking up much storage space. With these easy-to-make paper crafts, you can add a personal touch to your home design.
Practical and Useful Paper Crafts
One of my favorite aspects of paper crafting is the ability to create items that are both beautiful and functional. In this section, we’ll explore two practical paper crafts that not only showcase your creativity but also serve a purpose in your daily life.
Fruit Slice Bookmarks
Fruit slice bookmarks are a fun and creative way to encourage kids to read while developing their crafting skills. This paper craft requires just a few simple materials: craft glue, a pencil, scissors, multicolor craft paper, and a printable template.
To make a fruit slice bookmark, start by folding a small square piece of paper in half diagonally to create two triangles. Then, fold the top triangle in half, bringing the top corner to the bottom edge to create a pocket. Continue folding the corners and tucking them into the pocket to form an origami corner bookmark. Finally, decorate your bookmark with fruit-inspired designs cut out from colored paper.

3D Picture Frame
Another practical paper craft is the 3D picture frame. This project transforms an ordinary photo into a standout display through a simple technique of curling the frame edges to create dimension and visual interest. To make a 3D picture frame, you’ll need to cut out a frame from paper or cardstock, curl the edges, and assemble the frame around your chosen photo.
What makes these 3D frames special is how customizable they are. You can create them in themed colors for holidays, match them to your room decor, or even make them as personalized gifts. Both these practical paper crafts make excellent projects for beginners because they require minimal materials but create impressive results that you’ll actually use regularly.
I find that practical paper crafts like these are particularly satisfying because every time you use them, you’re reminded of your creative accomplishment. Whether you’re making fruit slice bookmarks or 3D picture frames, you’re not just crafting – you’re creating something that will be a part of your daily life.
Festive Paper Decorations for Any Celebration
One of my favorite ways to make any celebration more special is by creating my own festive paper decorations. With just a few simple materials, you can create beautiful and unique decorations that add a personal touch to any party or special occasion.
I’ve found that festive paper decorations add a personal touch to celebrations that store-bought decorations simply can’t match – plus they’re much more affordable! You can customize them to fit any theme or color scheme, making them perfect for birthdays, holidays, or just a fun gathering with friends.

Chinese Paper Lanterns
Chinese paper lanterns are a classic and easy paper craft project that can add a magical touch to any celebration. To make these beautiful lanterns, you’ll need multicolored paper, scissors, and tape.
Here’s a simple step-by-step guide:
- Fold a piece of paper in half lengthways.
- Cut strips from the fold until you’re 2 centimeters from the end.
- Lay out the paper, making a tube by taping the two shorter edges together.
- Create a handle by cutting out a rectangle from your paper and taping it to the top of the lantern.
Chinese paper lanterns create a magical atmosphere with their soft glow and can be customized with different colored papers, cut-out designs, or even painted patterns for truly unique decorations.
| Decoration | Materials | Customization |
|---|---|---|
| Chinese Lanterns | Multicolored paper, scissors, tape | Different colors, cut-out designs, painted patterns |
| Paper Pinwheels | Colored paper, scissors, glue | Various colors, designs, sizes |
Paper Pinwheels
Paper pinwheels are another fun and easy paper craft project that can bring a sense of whimsy and movement to any celebration. They can be mounted on walls, used as table centerpieces, or even given as party favors.
What makes pinwheels special is their interactive nature – they actually spin when blown on, making them particularly engaging decorations for children’s parties. You can customize them to match any party theme or holiday by using different colored papers and designs.
Both Chinese paper lanterns and paper pinwheels are practical options for those who love to decorate but have limited storage space, as they can be easily stored flat or disassembled.
“The key to successful paper lanterns is making even cuts when creating the slits – I recommend folding the paper first and drawing guidelines to ensure consistency.”
By incorporating these festive paper decorations into your celebrations, you can create a unique and memorable atmosphere that your guests will cherish.
Creative Wall Art Using Simple Paper Techniques
Transforming your wall into a vibrant art gallery is easier than you think with simple paper techniques. With a few basic materials and some creativity, you can create stunning wall art that adds a personal touch to your home decor.
Rainbow Paper Chain Wall Hanging
The Rainbow Paper Chain Wall Hanging is a fun and easy project that can spruce up any bedroom. Instead of purchasing expensive artwork, why not embellish your walls with your child’s colorful creation? This paper craft might even intrigue the teen in your life.
To make this project, you will need a rainbow template, scissors, a dowel, string, and multicolored cardstock. Start by mapping out your design using the template, which boasts squares representing two links each. Cut out strips for your rainbow from your multicolored cardstock, around 6 by 1 inch wide.
Now, it’s time to make your chains. Create a loop and hot glue the ends to forge a ring. Then, loop each strip together, using the template for reference. After creating your rows of rainbow chains, slide the tops onto a dowel. Attach a piece of sturdy string to your dowel and hang it up for all to see.

Paper Butterflies Wall Art
Paper Butterflies Wall Art creates a stunning 3D effect as the butterflies appear to be flying off the wall. I recommend mounting them with their wings slightly lifted for maximum dimension. The beauty of paper butterfly art is in the customization possibilities – you can arrange them in a specific pattern or scatter them randomly for a more organic look.
Both these wall art projects can be scaled to fit any space. They are perfect for rental homes or dorm rooms as they can be mounted with removable adhesive and won’t damage walls when it’s time to take them down.
I’m passionate about paper wall art because it allows you to create large-scale, high-impact decor for a fraction of the cost of purchased artwork. With these simple paper techniques, you can create beautiful and unique wall art that reflects your personality and style.
Jewelry and Accessories Made From Paper
I’ve always been fascinated by the possibility of turning paper into wearable art. Creating jewelry from paper allows for unlimited color combinations and patterns that would be expensive or impossible with traditional jewelry materials. With a few simple materials, you can create beautiful paper jewelry that’s perfect for any occasion.

Colorful Paper Beads
Did you know you can make beads out of paper? It’s a surprisingly easy and fun project. For this paper craft, you’ll need multicolored origami paper, scissors, glue, and skewer sticks. To create the beads, cut out long isosceles triangles from the origami paper and wrap them tightly around skewer sticks. Add a dab of glue toward the end of the paper to secure the bead.
You can get creative with your paper beads by adding glitter or having your kids thread them to make necklaces and bracelets. The longer and narrower the paper strips, the longer and thinner the resulting bead.
Folded Paper Bracelets
Folded paper bracelets use origami-inspired techniques to create surprisingly sturdy and flexible bands that can be worn just like conventional bracelets. To make them, you’ll need to fold the paper in a specific way and secure it with glue. The key to successful paper jewelry is proper sealing – I recommend multiple coats of clear acrylic sealer or Mod Podge to protect the paper from moisture and wear.
These paper jewelry projects are excellent for upcycling beautiful papers that might otherwise be discarded. You can transform magazine pages, gift wrap scraps, and even junk mail into stunning beads and bracelets, making it a great way to get creative and reduce waste.
Upcycled Paper Crafts From Household Items
I’ve always loved finding new uses for items that would otherwise end up in the recycling bin. Upcycling is a great way to get creative while being environmentally conscious. In this section, we’ll explore two fun and easy projects that you can make using household items.

Toilet Paper Roll Creatures
Toilet paper roll creatures are a fantastic craft project for kids. You can create a variety of animals, monsters, or fantasy characters using toilet paper rolls, scissors, and glue. Optional supplies include googly eyes, tissue paper, multicolored construction paper, pipe cleaners, foil, and pom-pom balls.
- Let your child’s imagination run wild and create unique creatures.
- Use different materials to add texture and color to your creations.
- These creatures can be used as toys or decorative items.
Paper Bag Pumpkin
Paper bag pumpkins are another great way to upcycle household items. By folding, cutting, and shaping brown paper bags, you can create charming fall decorations. The textured nature of paper bags gives these pumpkins a realistic, rustic quality.
- Transform ordinary paper bags into decorative items.
- Use simple folding and cutting techniques to create your pumpkins.
- These pumpkins are perfect for teaching children about sustainability.
Both of these upcycled paper crafts are excellent for kids, promoting creativity and environmental awareness. They’re also budget-friendly, using materials you likely have at home. So, next time you’re about to throw away those toilet paper rolls or paper bags, think twice and get creative!
Pro Tips for Perfect Paper Crafts Every Time
As a seasoned paper crafter, I’ve learned that the right techniques can make all the difference in creating stunning paper crafts. To achieve perfection, it’s essential to have the right tools and materials.
For paper craft staples, various cutters, glue, tape, and scissors are must-haves. When it comes to scissors, look for ones that are easy to wield, lightweight, and safe for little fingers. The blades should be made of sturdy material that lasts longer than standard metal and is safe to the touch.

- Investing in a good pair of scissors with comfortable grips and sharp blades will transform your cutting experience and improve precision.
- Always cut paper with the printed or colored side facing up to ensure accuracy in detailed cuts.
- When folding paper, create sharp, crisp folds by running your fingernail or a bone folder along each crease to elevate the professional appearance of your finished project.
- For gluing paper, less is more – apply glue sparingly to prevent warping and bubbling, especially when working with thinner papers.
- Use tweezers to handle and position small pieces when working with intricate paper cuts or delicate designs to prevent finger smudges and allow for precise placement.
- Read through all instructions before beginning a paper craft project and gather all materials in advance to prevent mid-project interruptions that can lead to mistakes.
- For dimensional paper crafts, allow adequate drying time between steps to prevent structural weaknesses.
- Store your finished paper crafts away from direct sunlight to prevent fading, and keep them in a dry environment to avoid warping or mildew issues over time.
By following these pro tips, you can ensure that your paper craft projects turn out perfectly every time, and you’ll be able to enjoy them for years to come.
Conclusion: Unleash Your Creativity With These Simple Paper Projects
As we conclude this journey through the world of paper crafting, it’s clear that creativity knows no bounds. I hope this collection of 16 cute and easy DIY paper crafts has inspired you to pick up some paper and start creating.
What I love most about paper crafts is their versatility – from practical projects like bookmarks and picture frames to decorative flowers and wall hangings, there’s truly something for every taste and purpose. Don’t be afraid to put your own spin on these projects – changing colors, sizes, or adding your own decorative touches makes each paper craft uniquely yours.
Paper crafting is not just about the finished product but also about the creative journey. Embrace the process and enjoy the meditative quality of cutting, folding, and assembling your creations. For those new to paper crafts, I recommend starting with simpler projects before progressing to more complex designs.
Remember, paper crafts offer endless possibilities beyond what’s been shared here. Once you master these techniques, you can combine and adapt them to create entirely new projects of your own design. I’d love to see what you create using these ideas – share your paper craft creations on social media and tag me so we can celebrate your creativity together!